DEP Is Now Required
All newly-purchased Macs must be built through Apple's Device Enrollment Program, or DEP.
...
This article will help you:
- Request an eligible Mac serial number be assigned to the Izzy server
- Stage the serial number in Izzy
- Build the Mac using a fresh install of macOS
- Log in and enable FileVault encryption
IMPORTANT
All Izzy managed Macs should be purchased through the campus Tech Shop, or CDW-G. When purchased through these vendors, the serial number will be enrolled in Apple's Device Enrollment Program, or DEP.
1. Request an eligible Mac serial number be assigned to the Izzy server for an 'on-campus build.'
- Contact the Izzy team on Slack or send us a ticket (izzy-support@umich.edu
...
- or miworkspace-mac-systems@umich.edu) with the serial number(s) to assign.
- "Hey Izzy team! Please assign GH7D4FKLX3FB for an on-campus build"
- Once assigned, it takes about
...
DEP Imaging – the new “on-campus” process.
This is very similar to the “@home” process – with the differences being that you will set up FileVault (“ironizzy”) when you claim the computer, log in with the “UM-Support” account after build and wait a few minutes until the Bootstrap application runs before doing anything else.
For new out of the box systems, the ideal path is as follows:
...
Contact us with the serial number to get the system assigned to our MDM server for an on-campus build. (If you are buying from Marketsite, you can find the serial number of a device in transit through the order status view. The PO number is usually the easiest way to find the right order.)
...
Wait for about an hour after we've acknowledged the MDM assignment.
...
- 15min for the change to take effect and you can proceed with the build
- Serial numbers never start with "S" and never contain the letters "A", "B", "E", "I", "O", "S", or "Z"; they do contain zeros and ones.
2. Stage the serial number in Izzy
- The 'Stage System' field can be found in the top left of https://izzy.dsc.umich.edu
...
- /
- Enter the serial number and
...
- click Stage or Claim
...
- Choose a destination group for this mac
...
- and press 'Pair
...
- '
...
- Rename the system
...
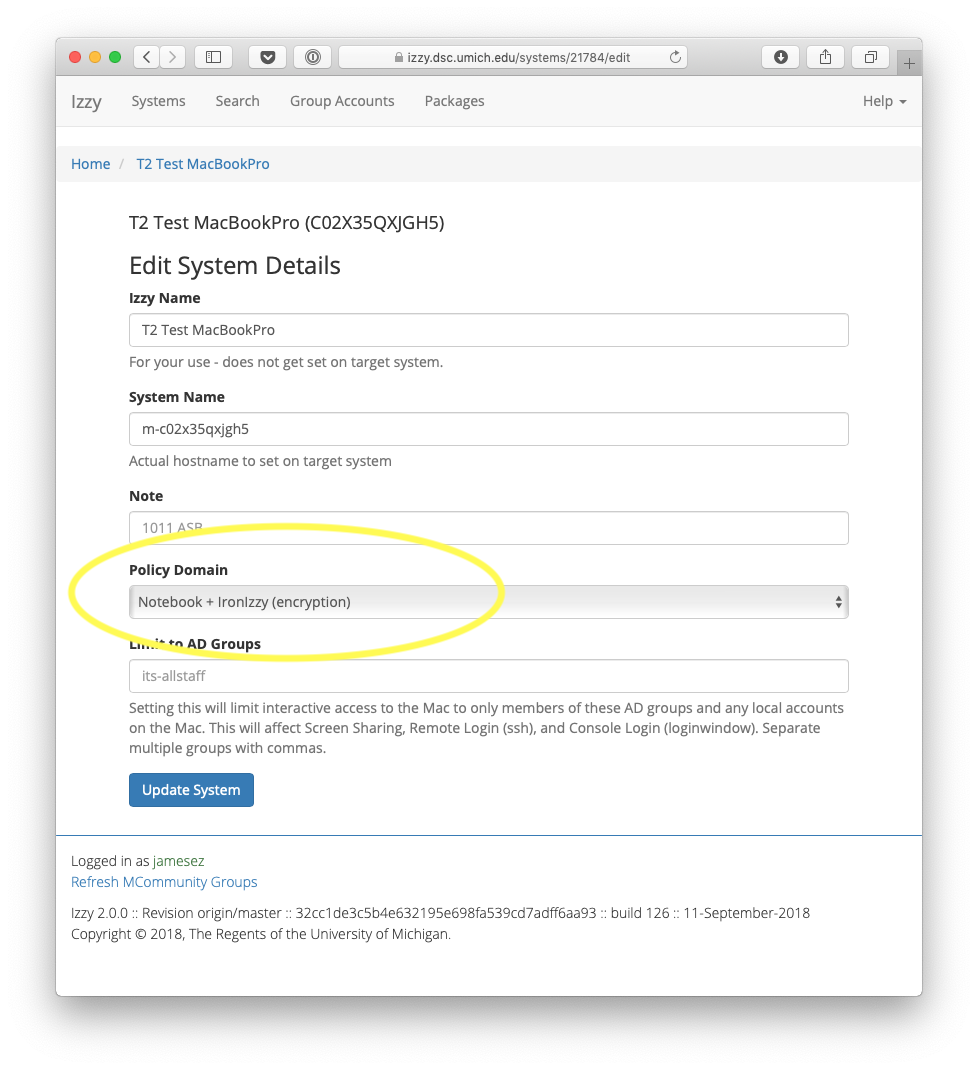
- and verify the Policy Domain
- Navigate to the computer's Izzy record
...
- (use the search within Izzy to quickly find the system you are working with)
- Click 'Rename'
- Edit the 'Izzy Name' to include the serial number or some other descriptive text that could easily be used to help locate the computer.
...
- MiWorkspace: Please include the uniqname of the primary computer user if this is a dedicated computer.
- If the system is going to be encrypted with FileVault (which we strongly recommend) Set the Policy Domain to something containing 'ironizzy.' Do this before you continue!
- Otherwise, please choose the appropriate policy domain.
3. Build the Mac using a fresh install of macOS
Unbox the Mac and
...
power it
...
on.
If the
...
Mac has already
...
been through 'Setup Assistant,' or otherwise been in-use, it should be wiped-and-reloaded before starting the process.
...
If you are unsure of how to wipe-and-reload
...
a Mac with a current
...
Click Continue.
...
version of macOS, please see the links at the bottom of the page.
...
- Connect to a wired network using the built-in ethernet port, or an Apple branded network adapter for portable Macs.
Advance through 'Setup Assistant.' The first few prompts will help you pick the preferred language and region.
After language and region selections, you should see a 'Remote Management' screen letting you know this Mac will be managed.
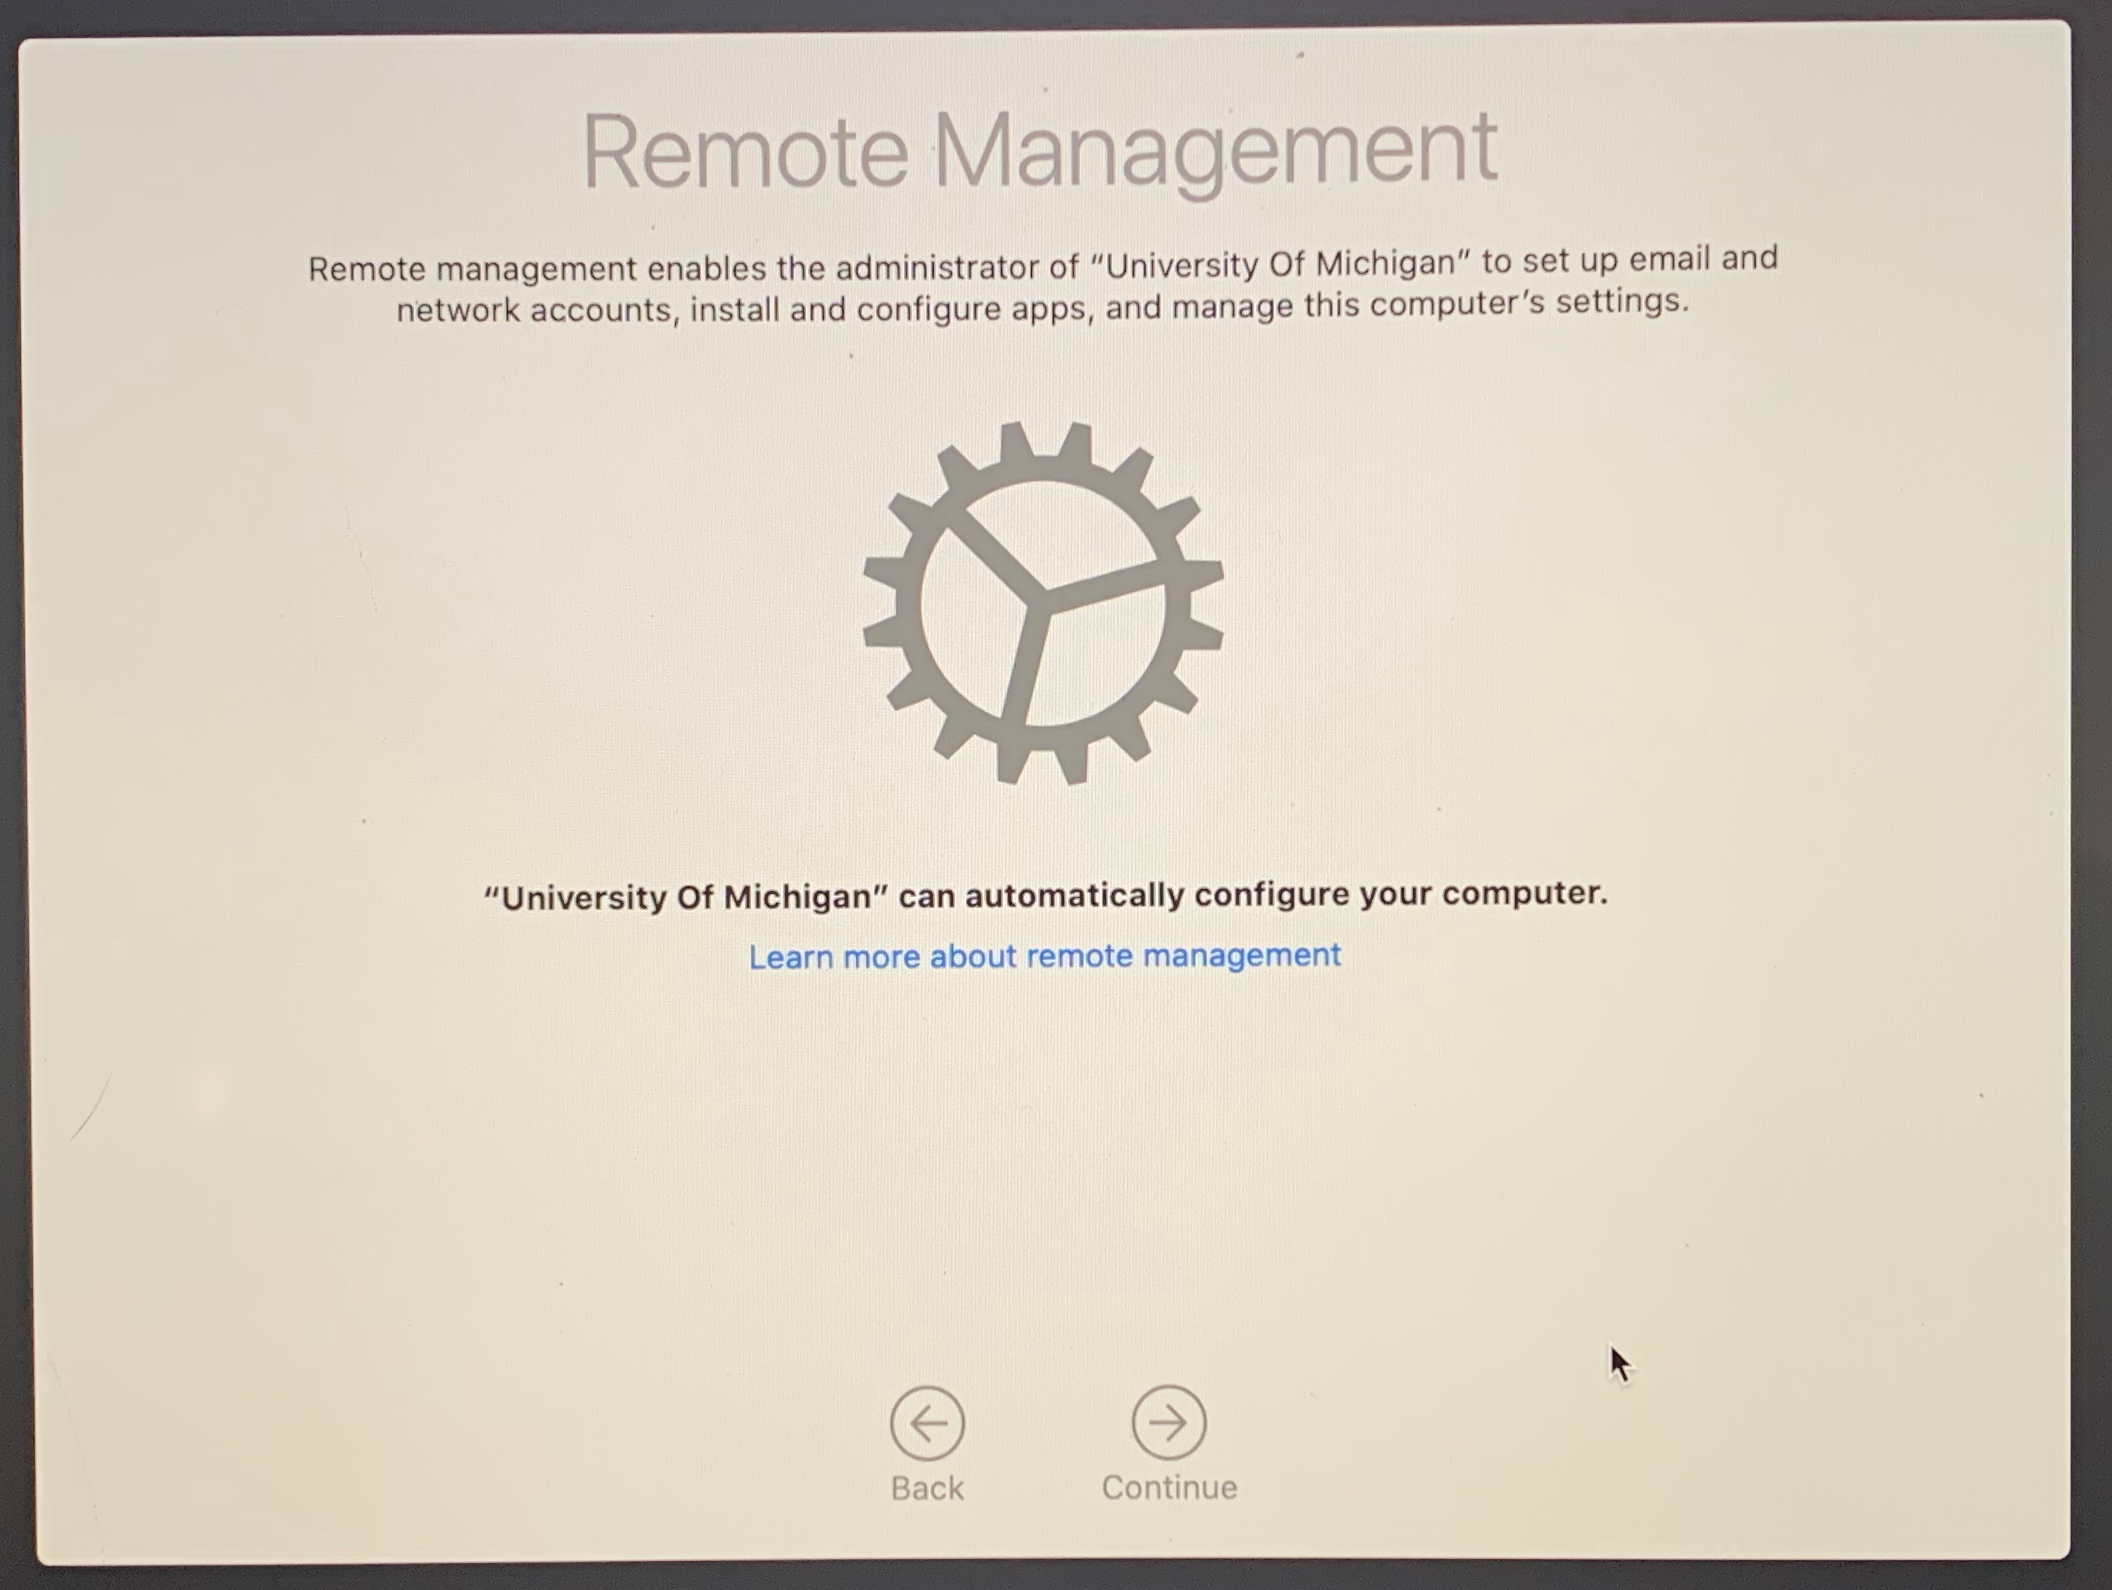
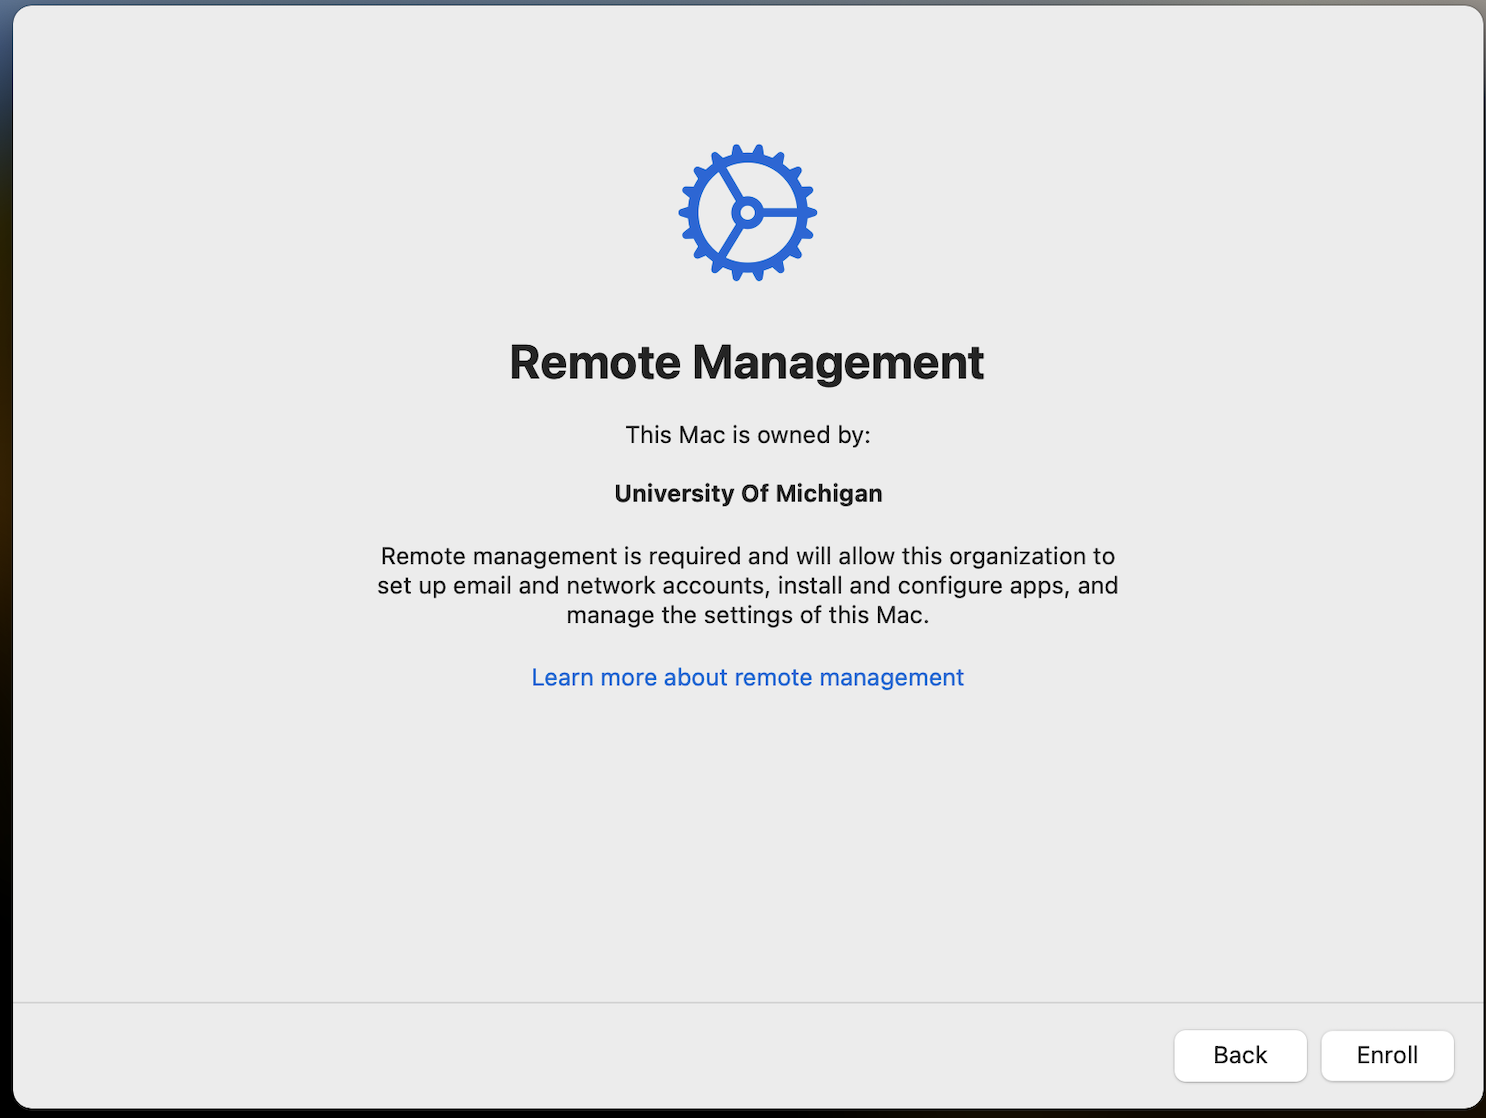
Click Continue (or Enroll on Sonoma or later) to proceed
Setup Assistant will now skip a bunch of questions and you should walk through any default options. UNLESS:
If you see the 'create an account' pane, things didn't sync up and the Mac didn't pick up its DEP config. Often the easiest thing is to wipe and reload the OS through Internet Recovery (or use a boot stick on an M1 Mac) and start over. If you are unsure of how to wipe-and-reload mac with a current OS, please see the links at the bottom of the page.
If you see the ‘create an account’ pane after the Remote Management screen, this means the system is assigned to the Izzy @Home workflow and you should reach out to us to change the assignment to the on-campus workflow before starting over. More info about the @home workflow can be found here.
...
4. Log in and enable FileVault encryption
When the computer has finished
...
walking through Setup Assistant, you should land at the login screen
Important: The first account to log into a Mac receives a 'Secure Token' which allows for enabling encryption, account creation and other 'admin' tasks.
Log into the computer with the
...
"UM-Support" account and associated password.
...
If you do not know the password to this account, please ask the Mac Team in Slack
...
You should not log into the computer with your M-1 or any other account initially
...
Wait about 2 minutes after initial log in – do not do anything else! – and the “U-M Izzy Bootstrap” process that will install software will pop up
...
Before clicking “Logout” – if you have turned on FileVault for the computer (which is still strongly recommended) confirm that the 'Enable FileVault' profile has landed in System Preferences > Profiles before logging out. If it is not there - please reach out to the Mac Team on Slack before continuing!
...
. NOTE – if the bootstrap does not show up after a couple of minutes – log out of UM-Support and log back in (do not restart the computer!) and it should show up right after that second login.)
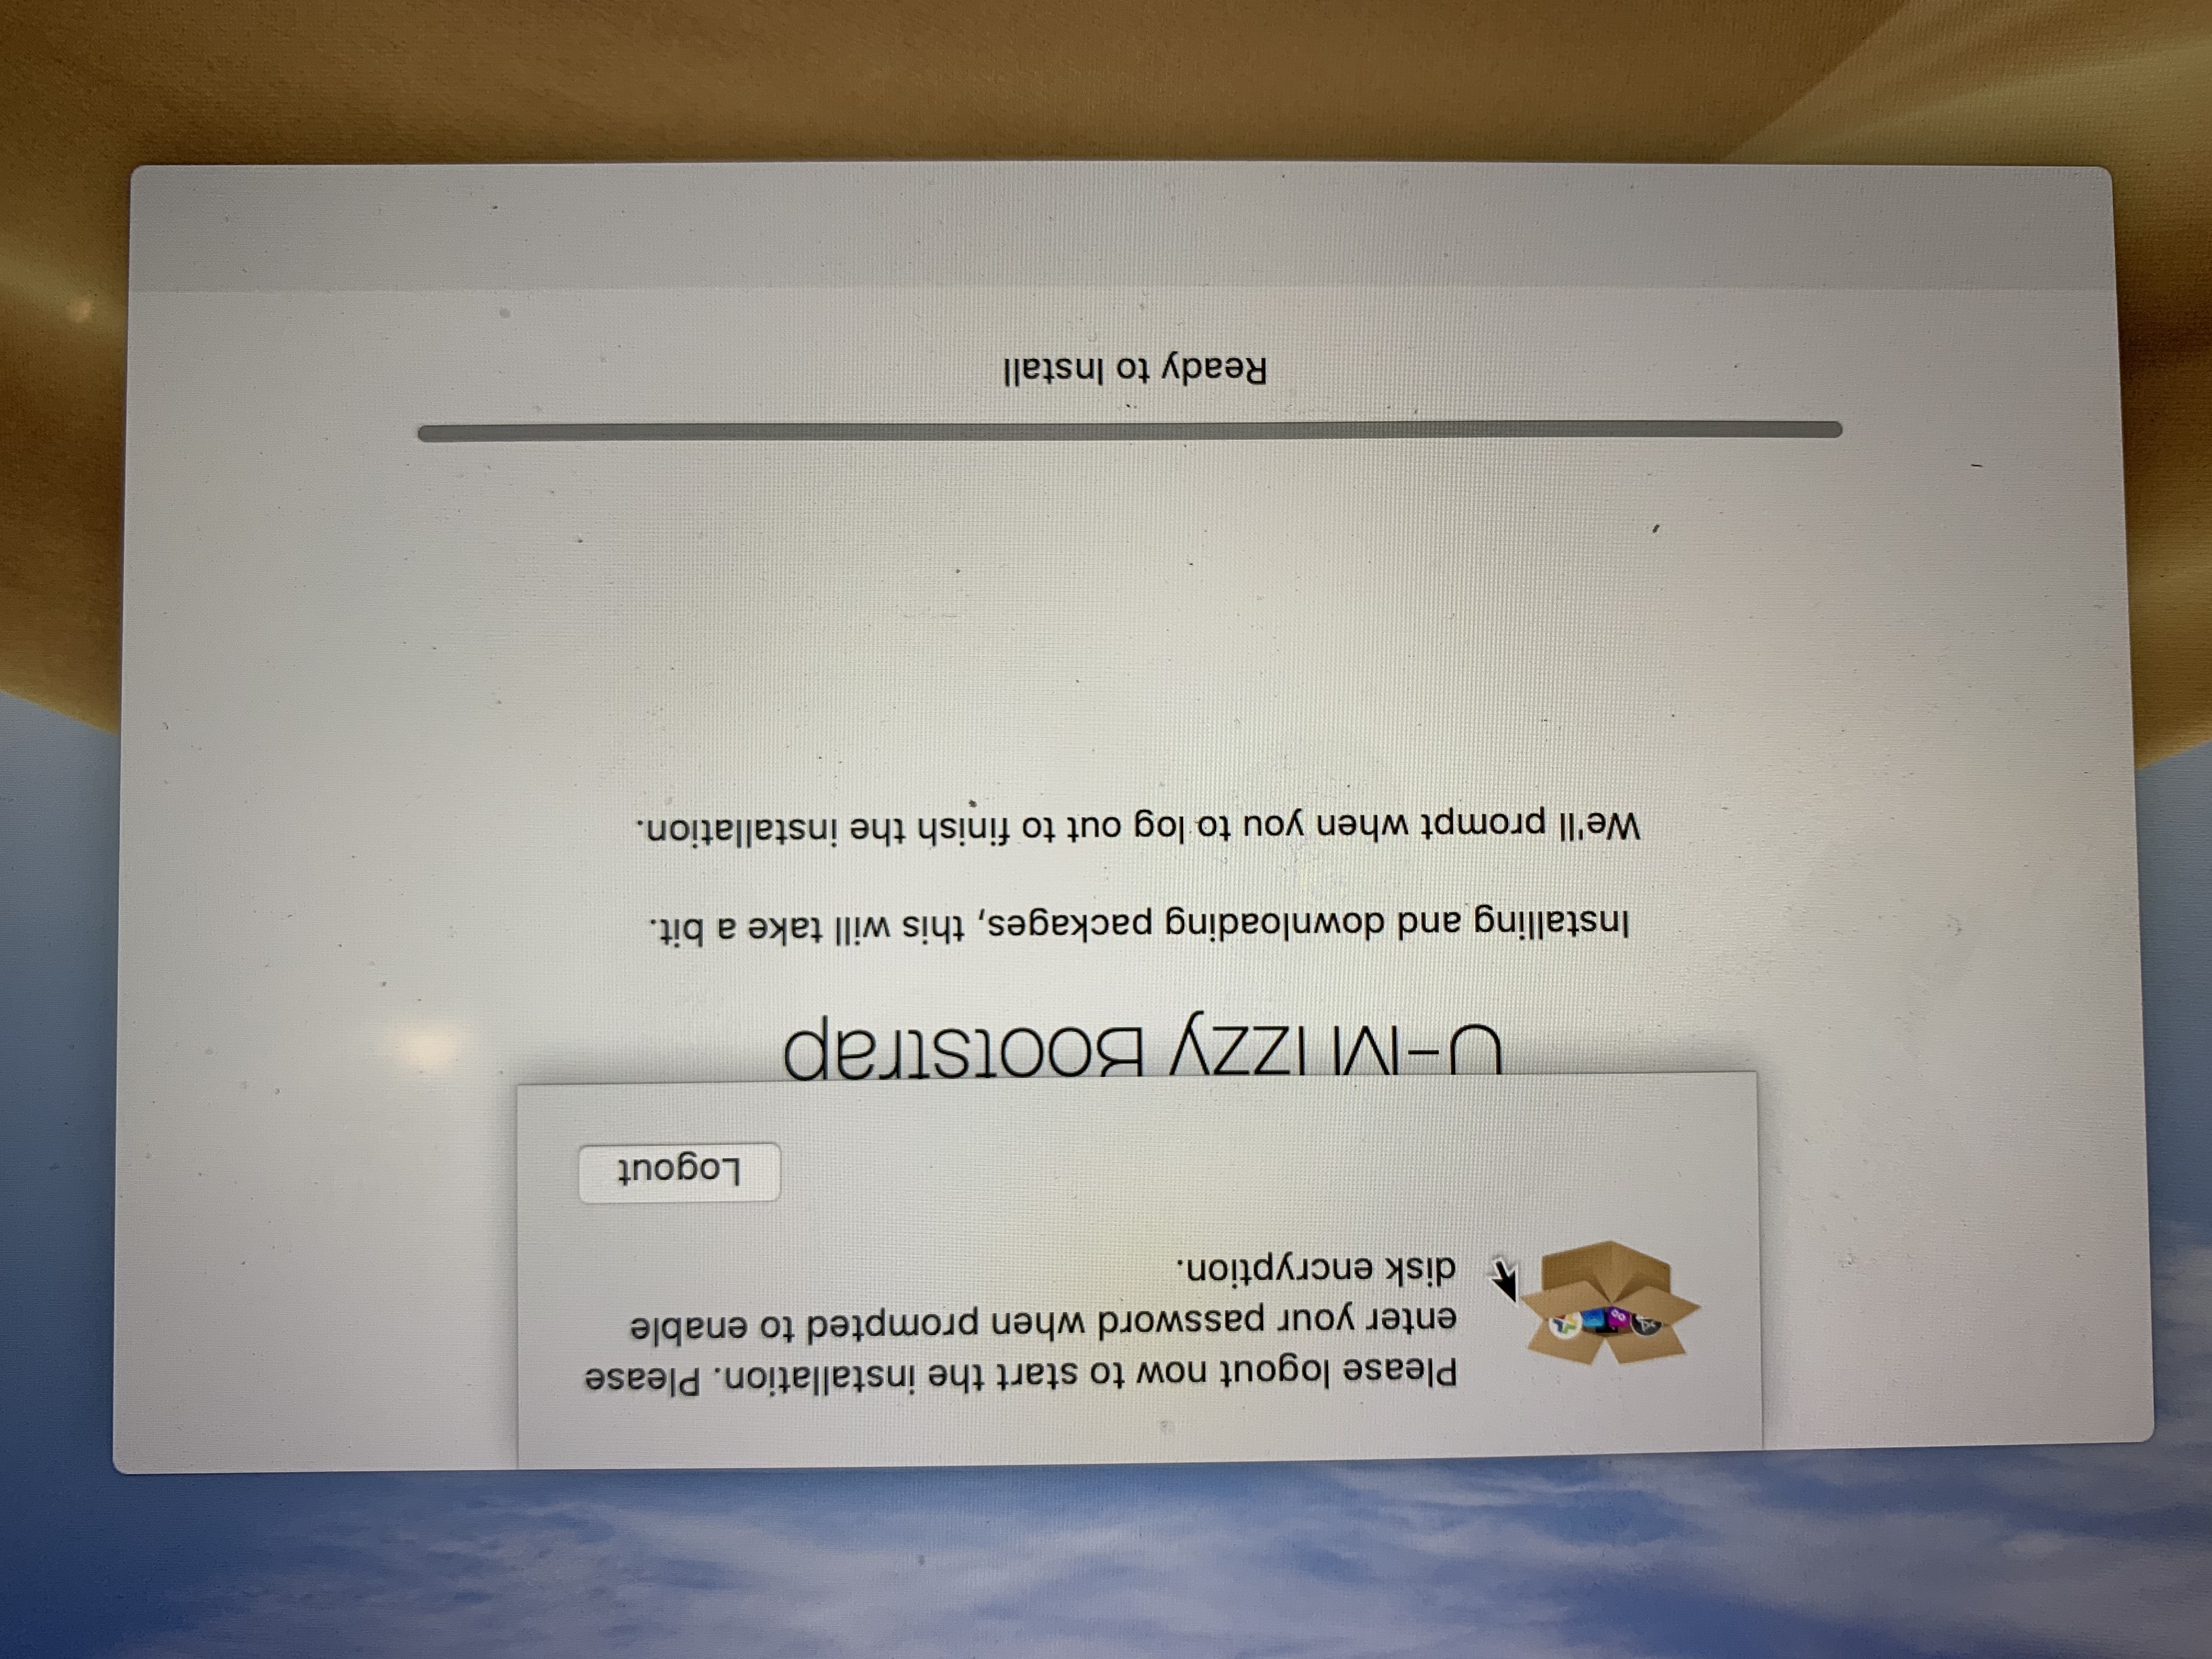
When prompted, click 'Logout' to finish any remaining software installations.
If you set an “ironizzy” Policy Domain for this build, FileVault will be silently enabled upon logout.
After Managed Software Center has finished installing any remaining updates, Please reboot the Mac, and verify that the UM-Support account is able to unlock FileVault
Unlocking FileVault with the UM-Support account will take you to the Desktop, choose → "Log Out UM-Support..." to return to the Login Window
VERY IMPORTANT: Do not
...
log in with any account other than “UM-Support” until FileVault has been
...
enabled!
...
Logging in with any other account before FileVault is turned on can break this automatic workflow and password rotations. It is strongly recommended that you reboot the computer one final time before proceeding to
...
confirm FileVault is configured correctly!
To add new users to the FileVaulted computer: Log in at the boot screen to the "UM-Support" account. Once logged in, then log out. This will bring you back to the NoMAD login screen and you can have additional users log in. The users will be automatically FileVaulted so you do not need to manually add them any more!
- All new user accounts should now log in from the Microsoft 365 login screen and will be automatically FileVault enabled if applicable.
- Reboot one more time to verify proper log-ons and software updates have been applied.
Additional Information
Izzystor restored users might not show up on the boot screen after they log in. If that happens, go to Applications → Utilities → Service Provider Support and run the “Update Preboot (requires restart)” task
...
.
- More details on the "UM-Support" and the "UM FileVault Mgmt" accounts can be found here: Izzy-Managed Support Accounts
...
Instructions on how to wipe-and-reload
...
...
...
...