How to wipe-and-reload a Mac using a boot disk (Big Sur and up!)
NOTE: There will be some differences for Apple Silicon (M1) macs in this article and those will be noted accordingly:
Prepare a USB boot drive (USB-A or USB-C depending on hardware model) with macOS on it according to these instructions here. NOTE: The rest of the instructions presume you are using a boot disk with a current version of Big Sur (11.6.5 or later) or Monterey (12.3.1 or later) on it. ALWAYS – use a boot stick with the latest version of macOS on it!
Power the computer off and connect your USB boot disk *and* Ethernet connection to the Mac (The "daisy-chain" Ethernet adapters are recommended, but Belkin seems to work here, too…)
Power on the computer by holding down the power button until the USB disk shows as a bootable option. Select your boot disk and continue.
You will have two possibilities after the boot stick boots up the computer into the Recovery mode:
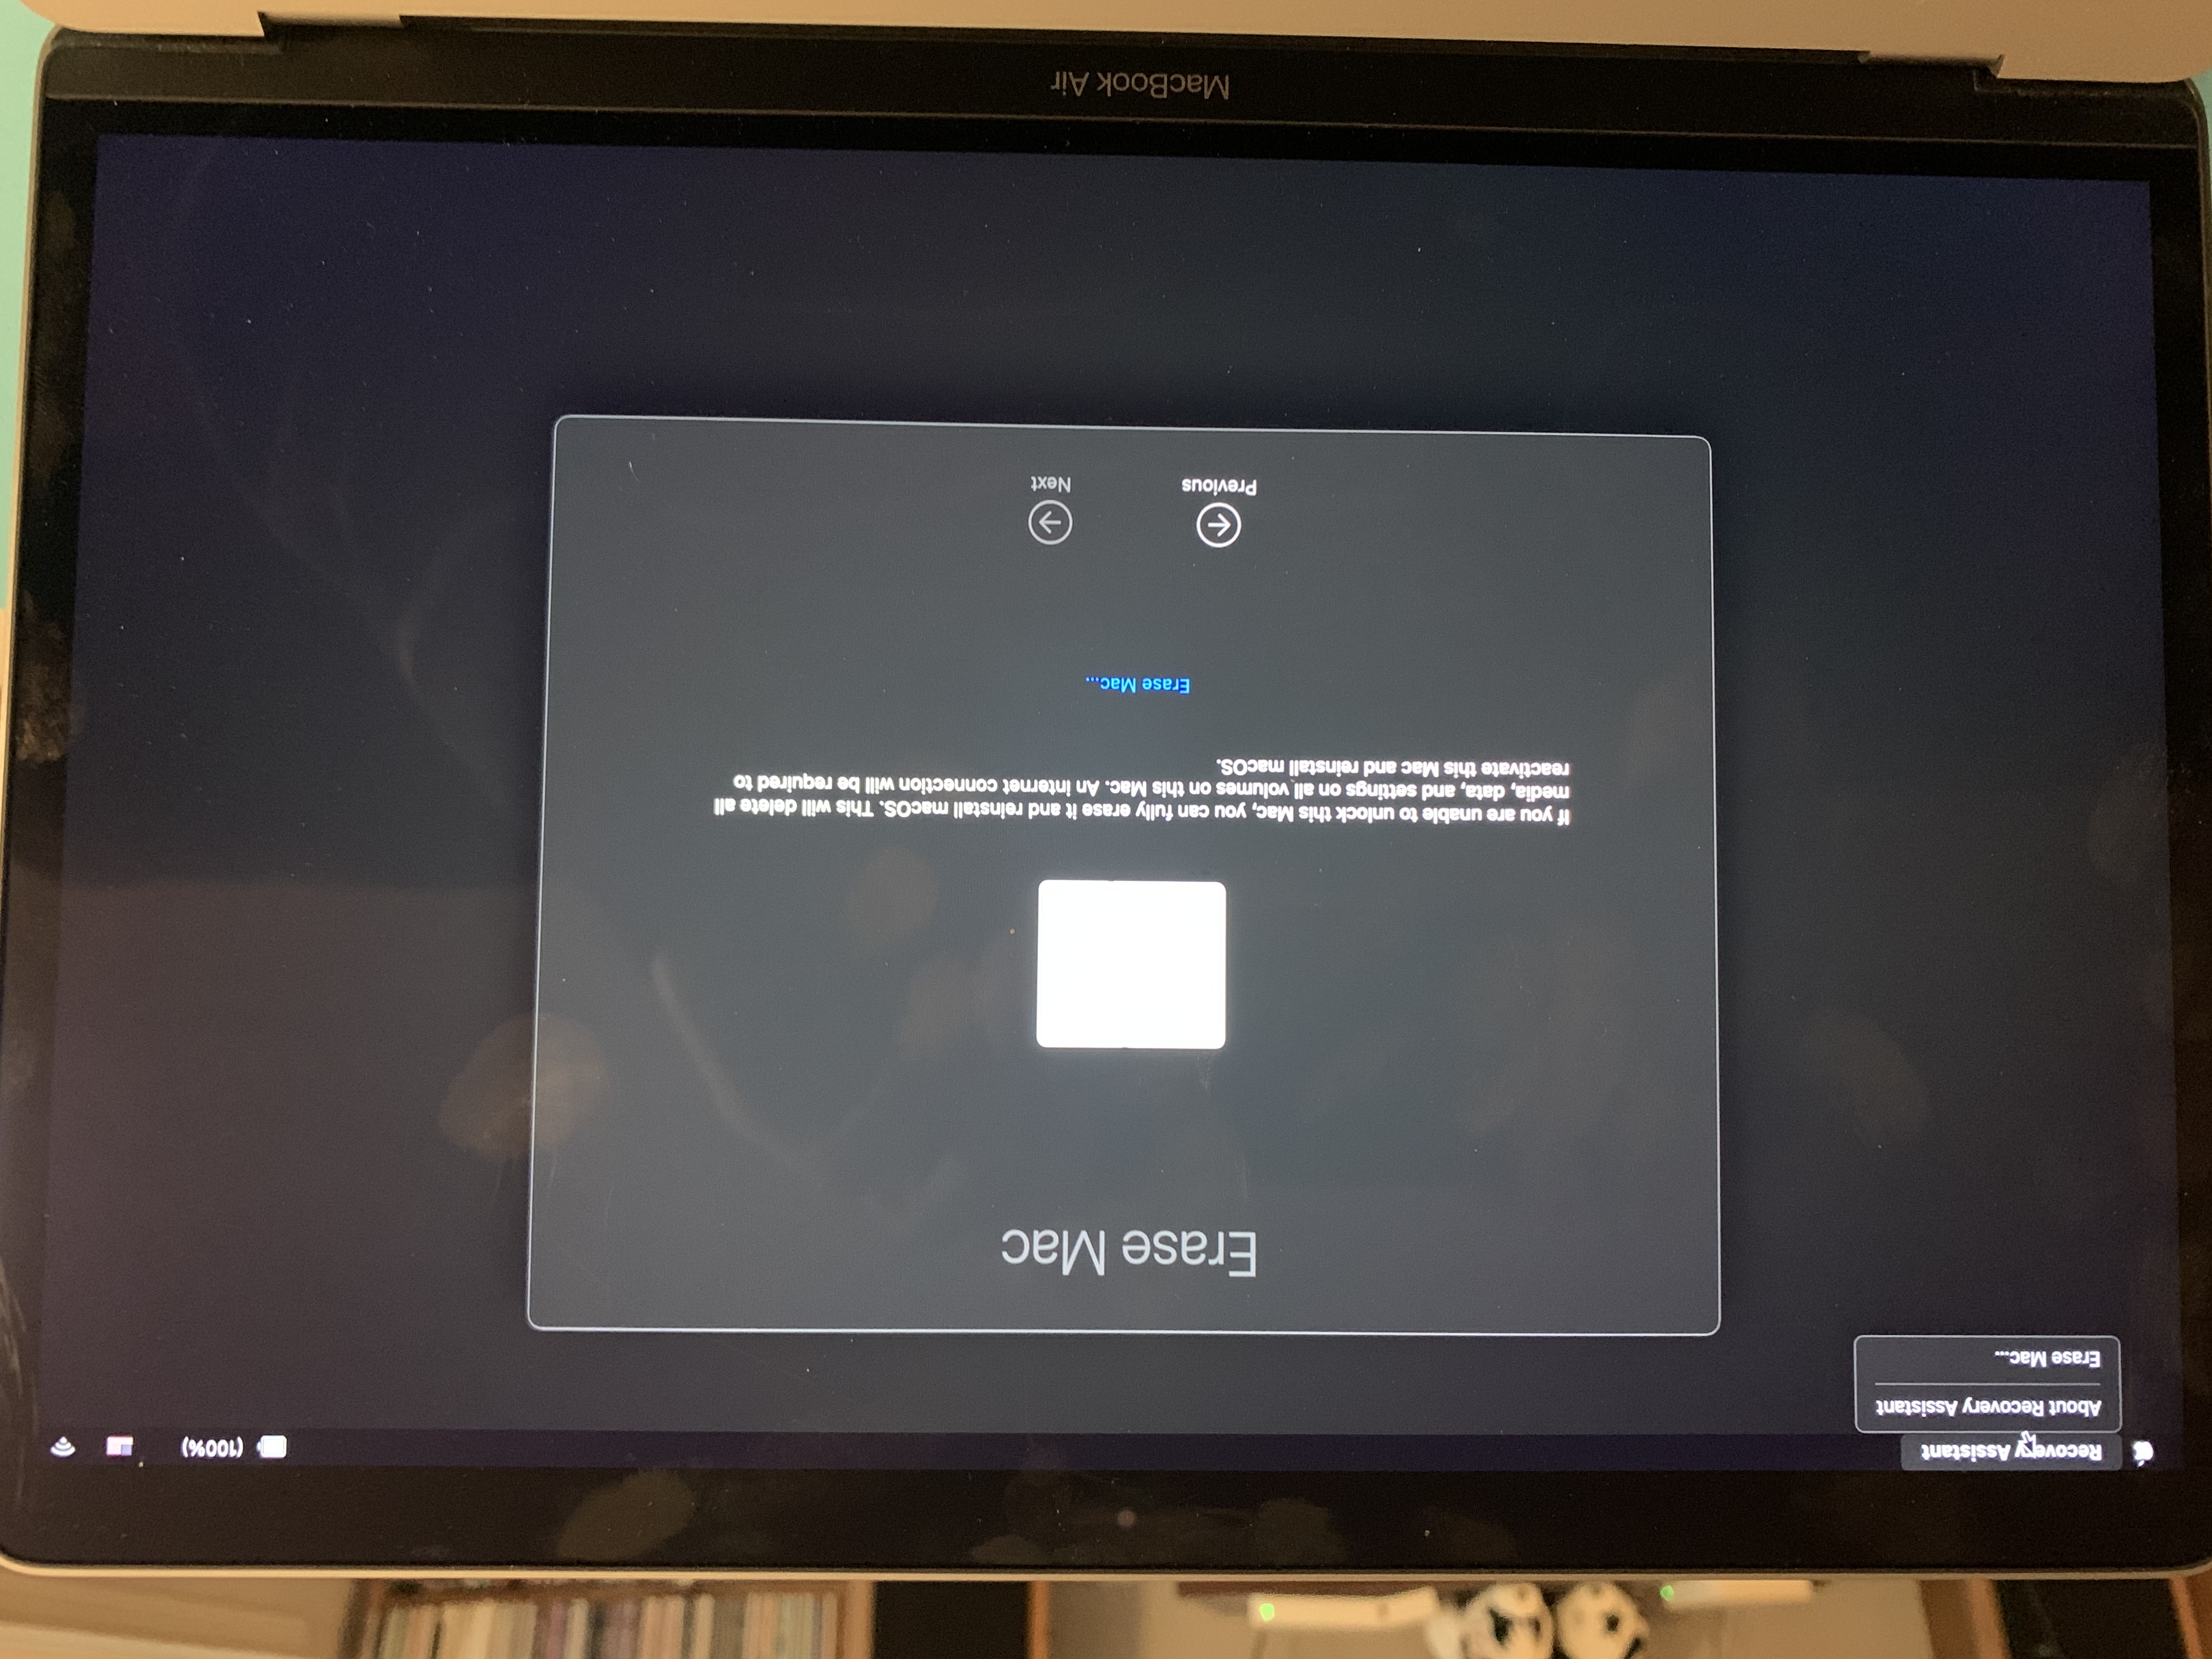
1) If the Disk is already FileVaulted, you will see accounts and an ask to provide a password to unlock the disk. DO NOT UNLOCK THE DISK at this point – this will cause problems.
INSTEAD: Under the “Recovery Assistant” menu, select “Erase Mac” and click the “Erase Mac” blue highlighted link and follow the steps. This should be the most common option for a FileVaulted izzy mac.
2) If the disk is *not* FileVaulted — you will be booted to the “Install macOS Big Sur” screen. AT THIS POINT — Quit "Install macOS Big Sur"
NEXT: Go to the “Utilities” menu and select “Terminal” and enter “resetpassword”. This will bring up a UI underneath the Terminal window after that command runs:
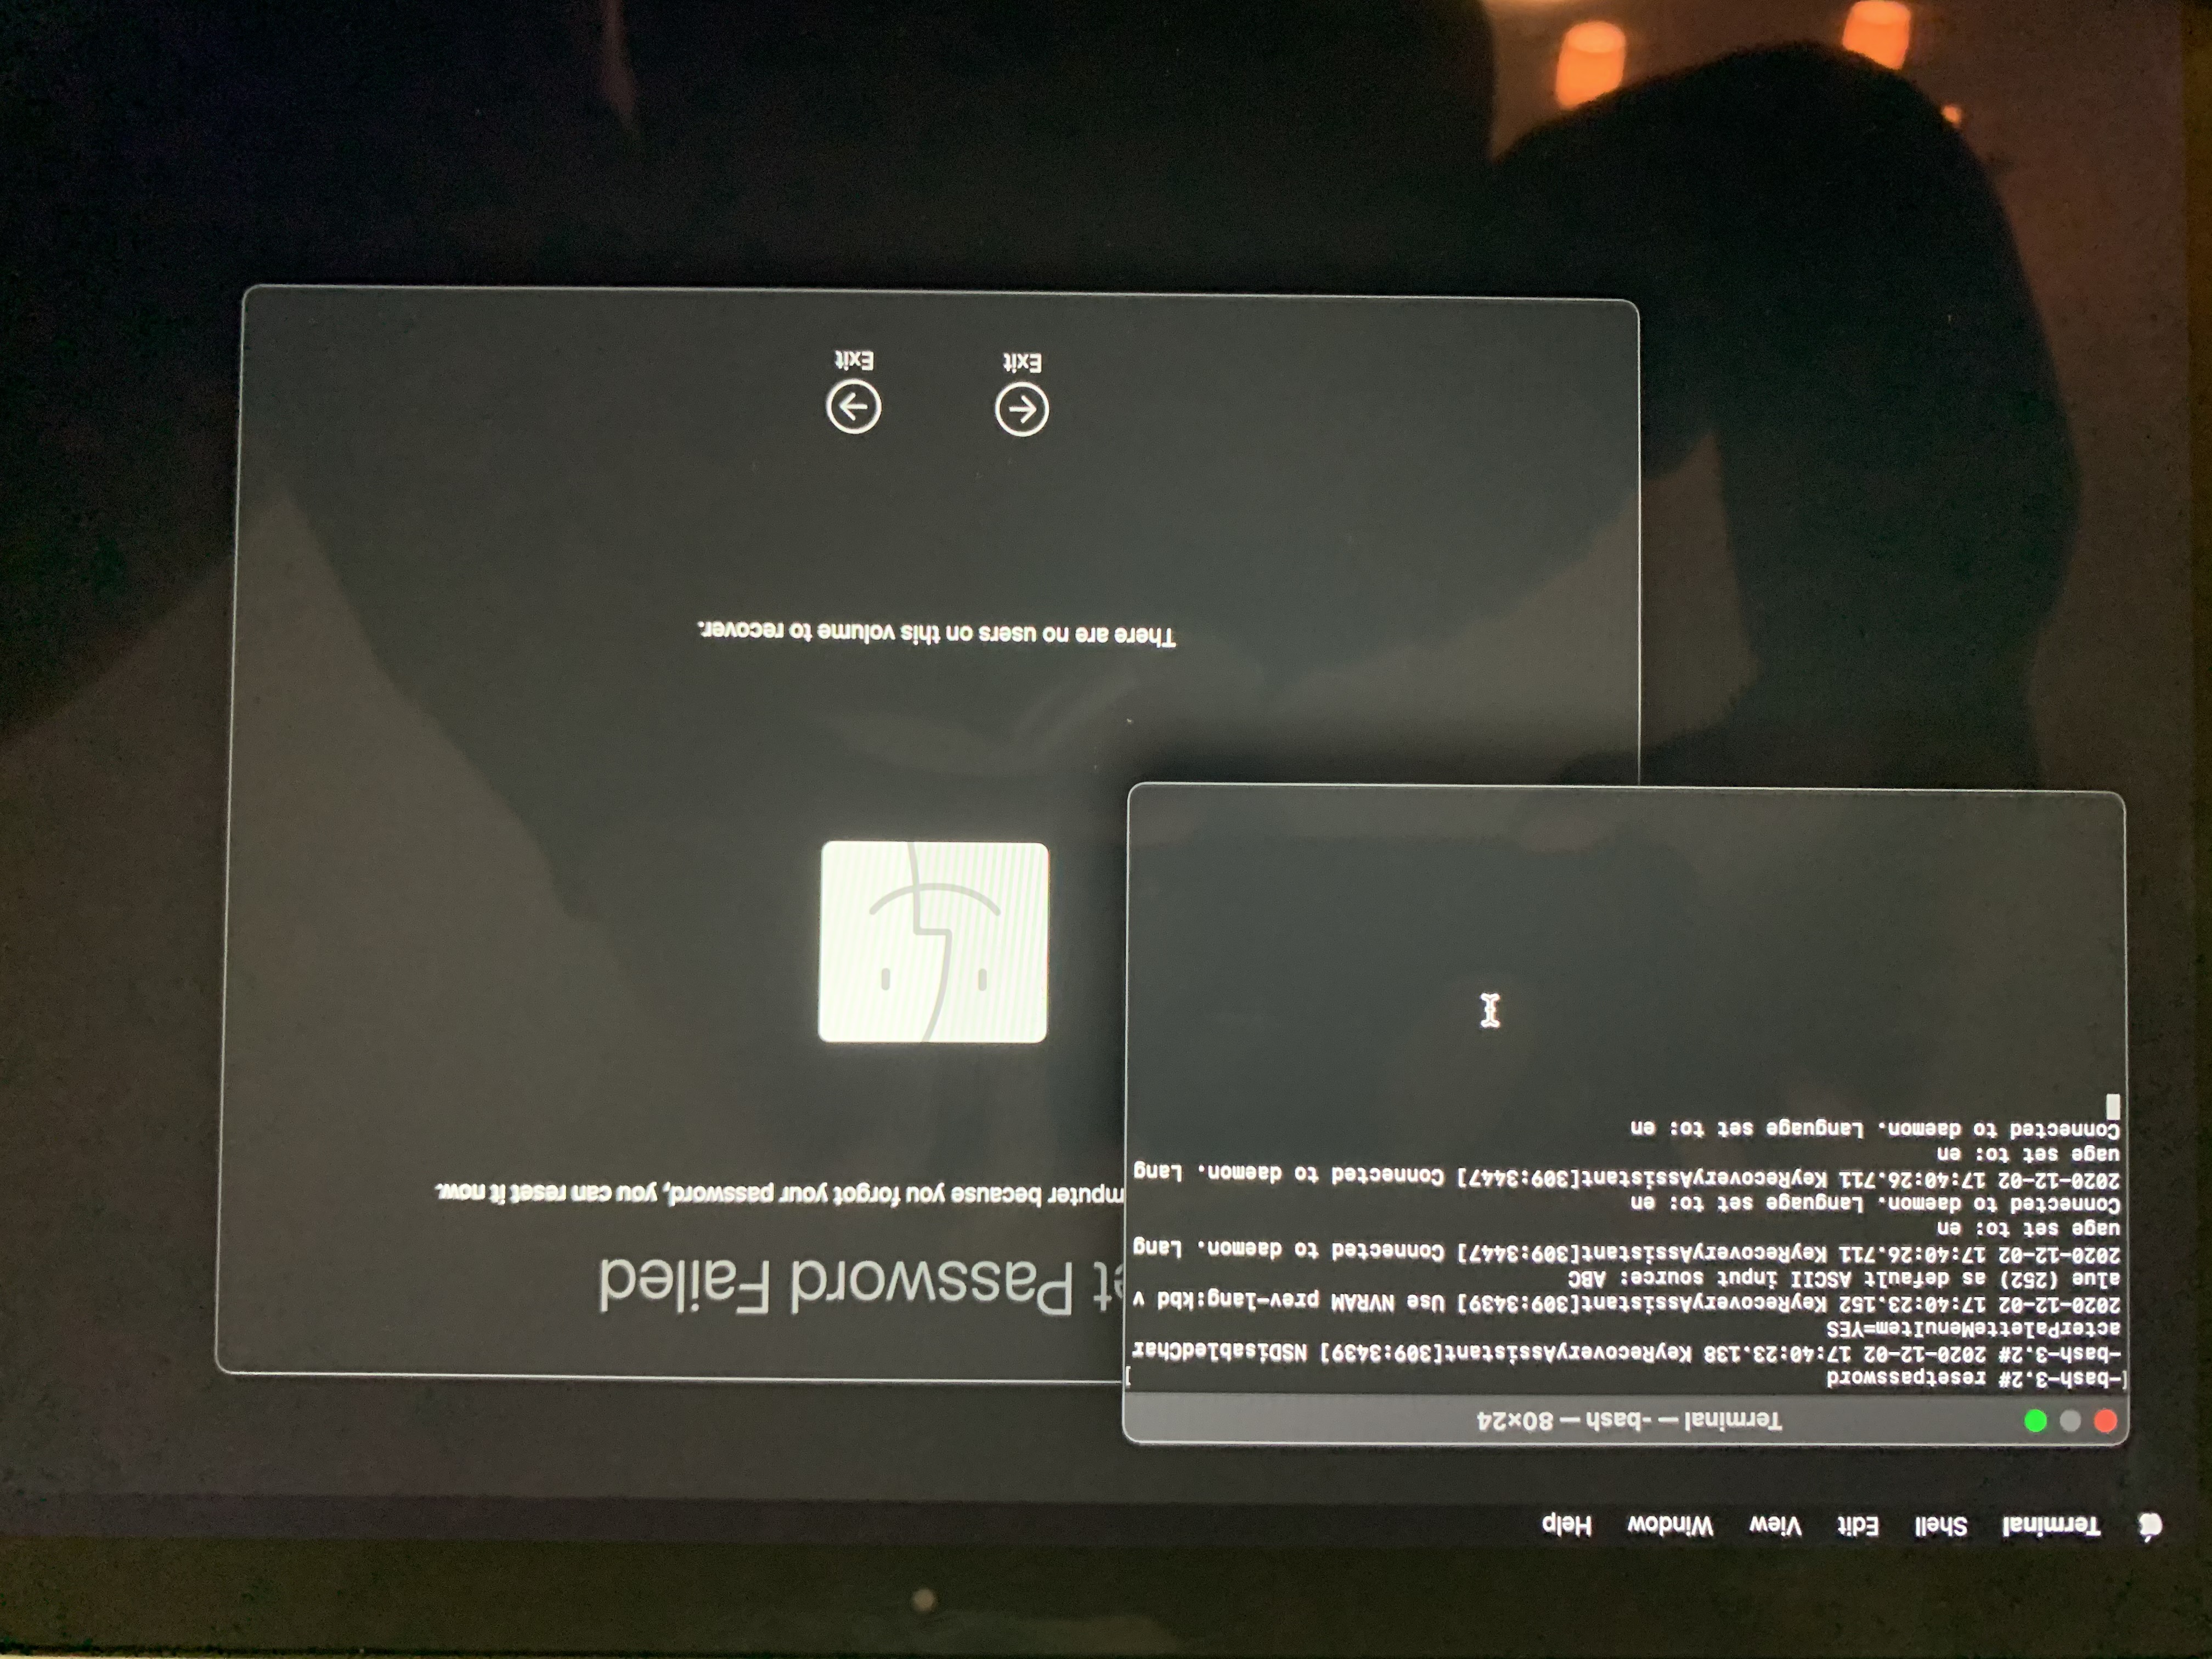
NEXT: Switch to that UI and under the “Recovery Assistant” menu, select “Erase Mac” and click the “Erase Mac” blue highlighted link and follow the steps.
This will erase the deviceand reboot the computer from the external USB drive again (you should not need to reselect it.)
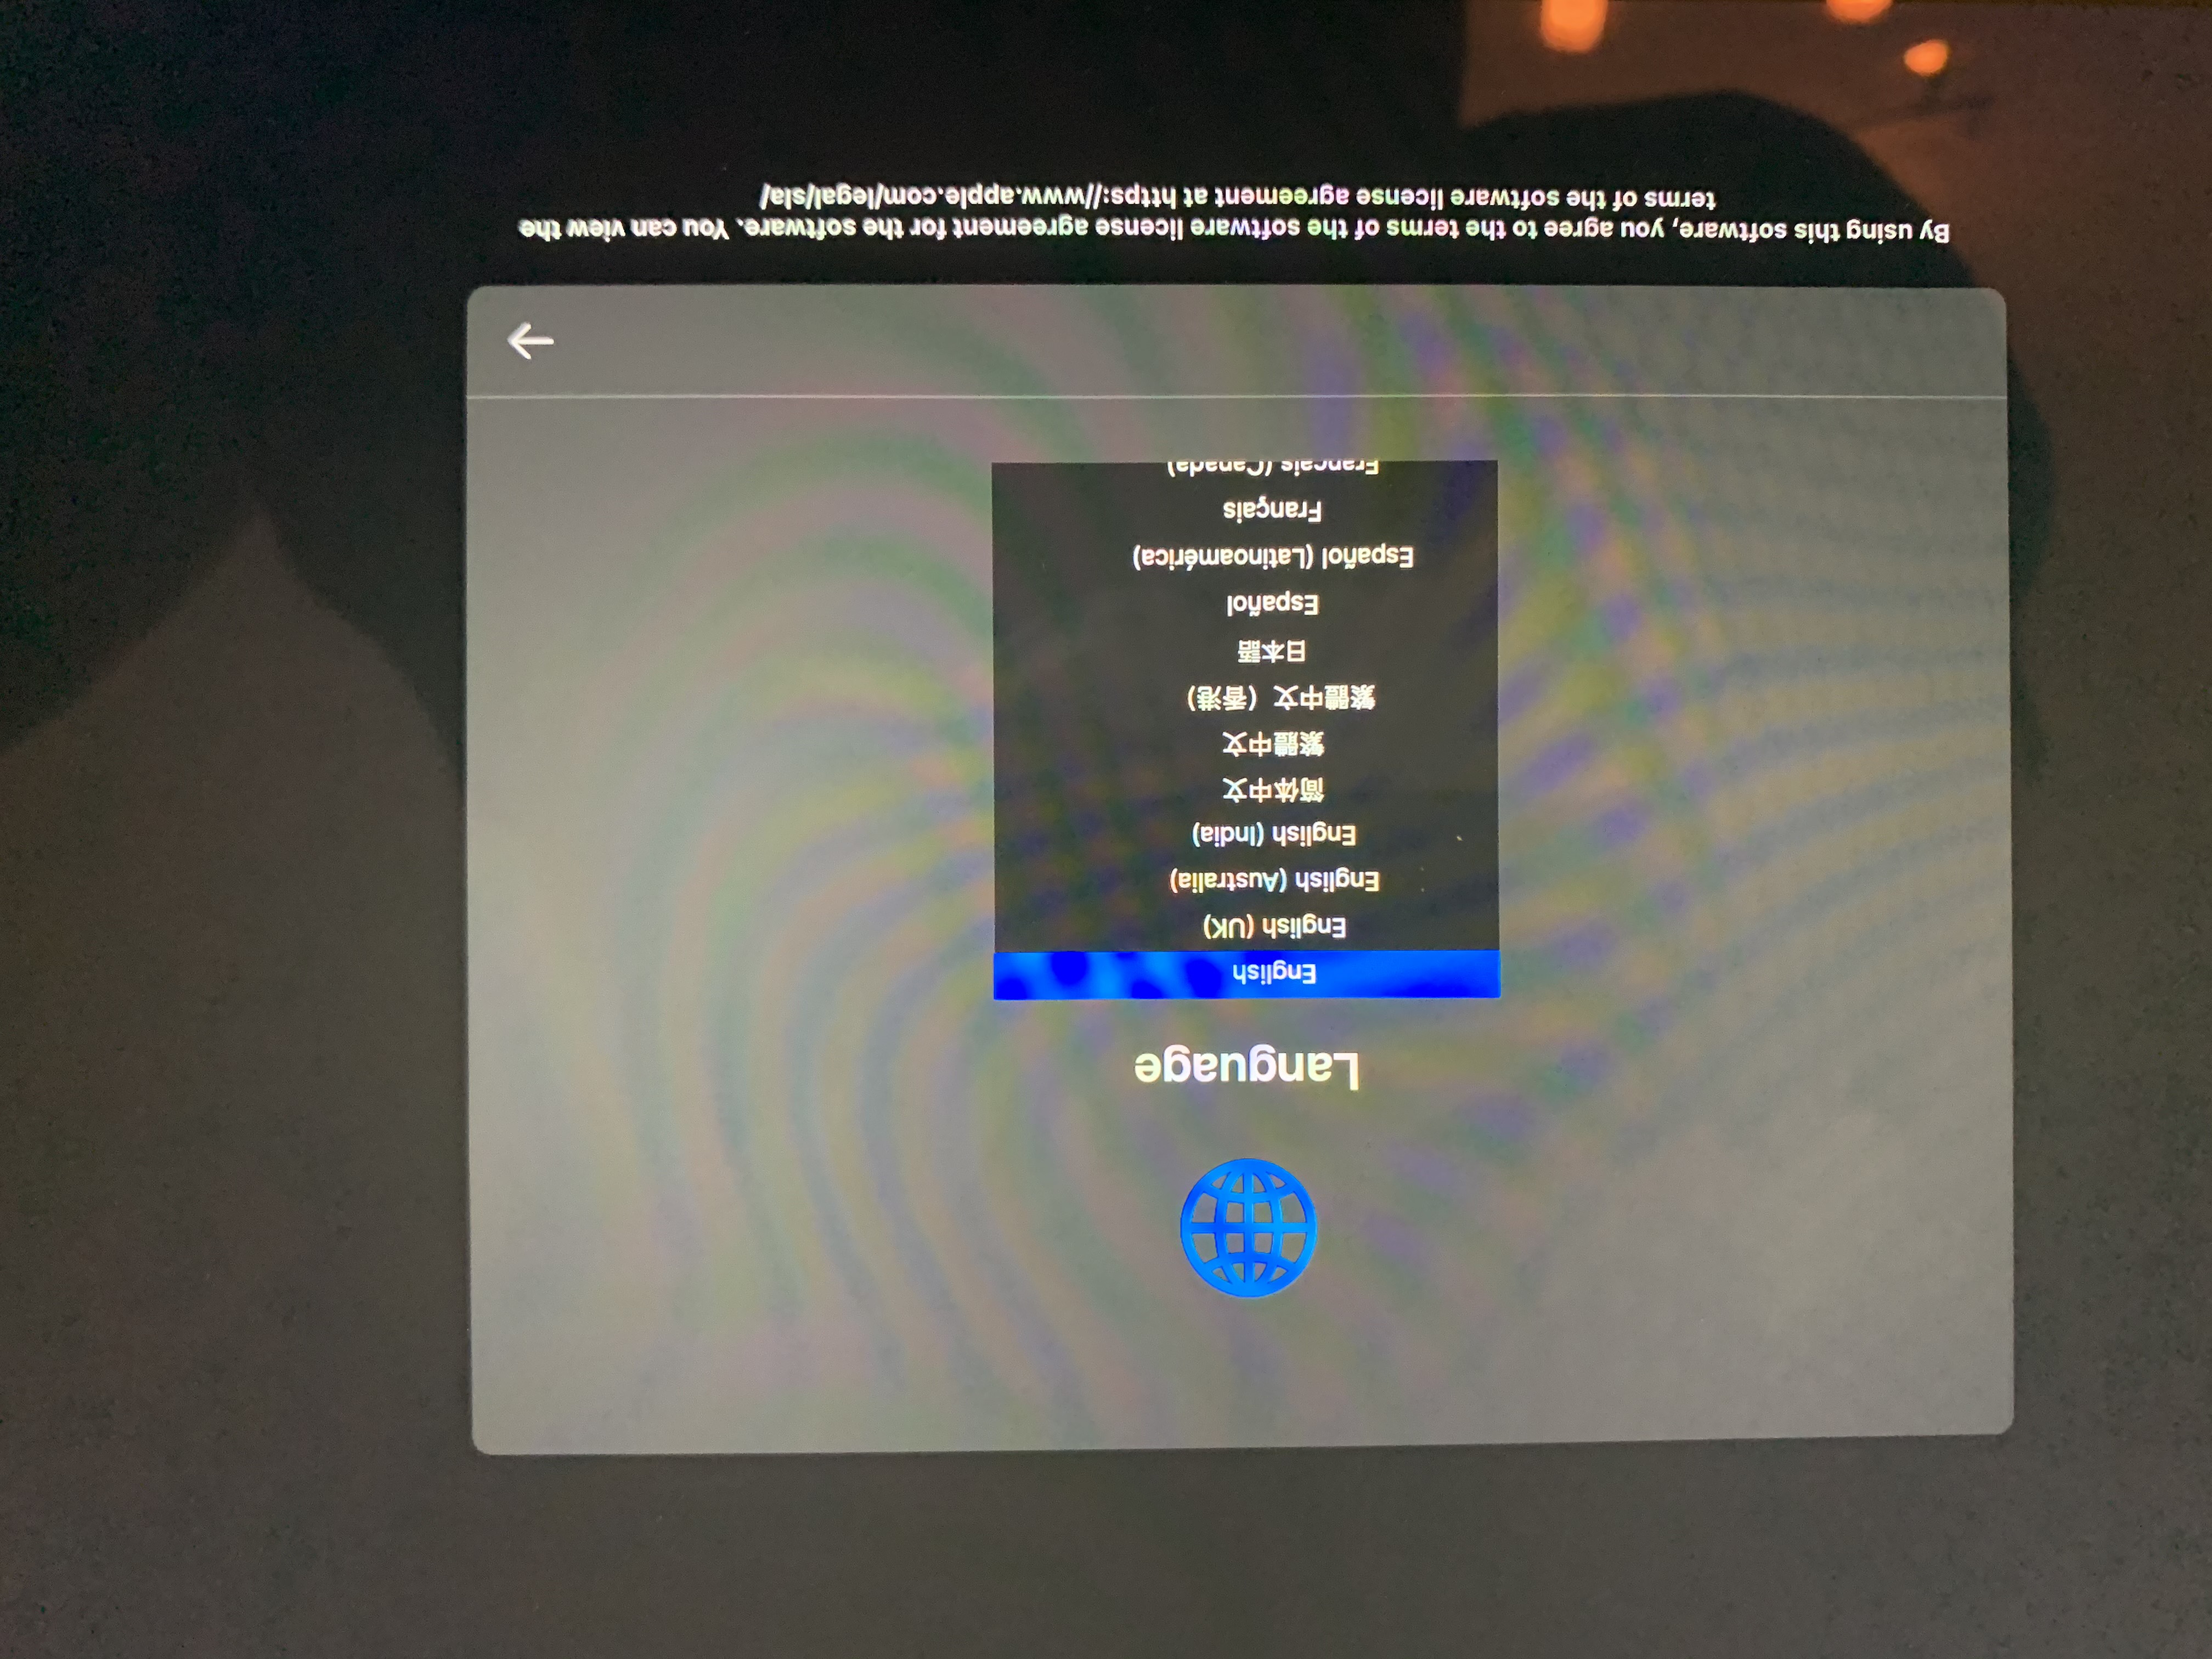
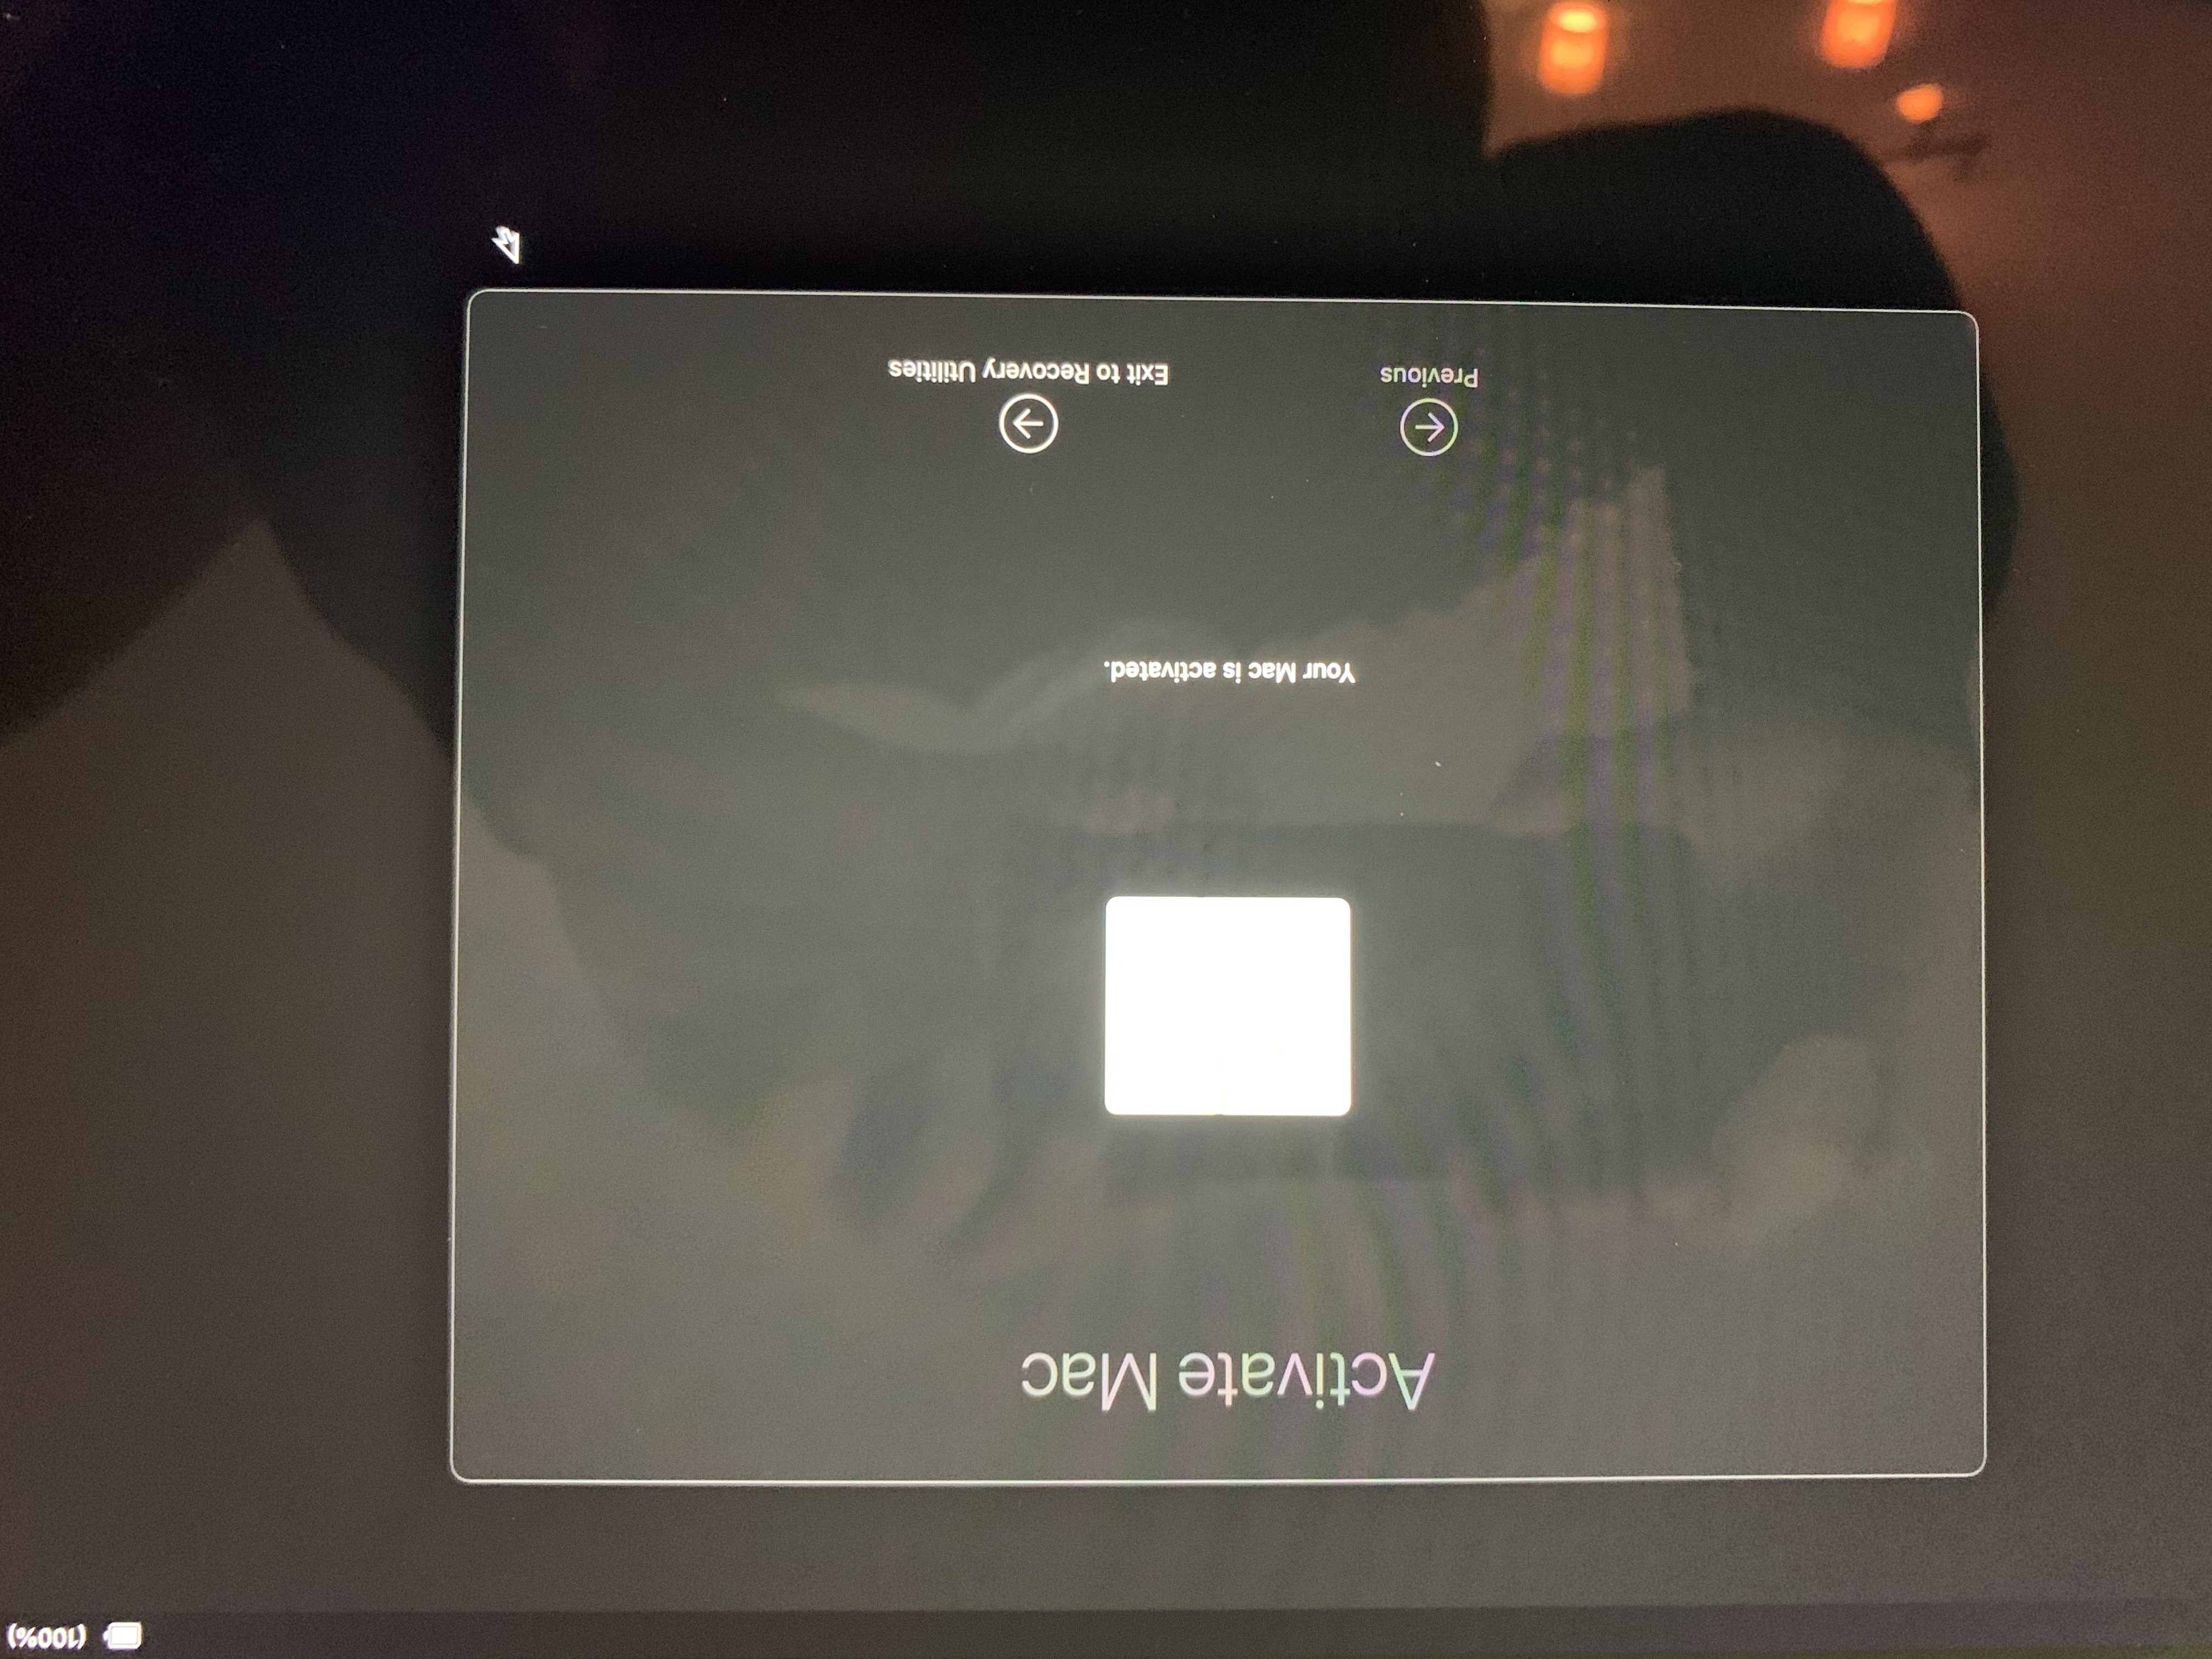
After either method of choosing “Erase Mac” and rebooting…
This will take you to a Language selection. NOTE: For an Apple Silicon Mac (M1) walk through this to “Activate Mac” and “Exit to Recovery Utilities” when done. Non-Apple Silicon macs will not get the "Activate Mac" screen.
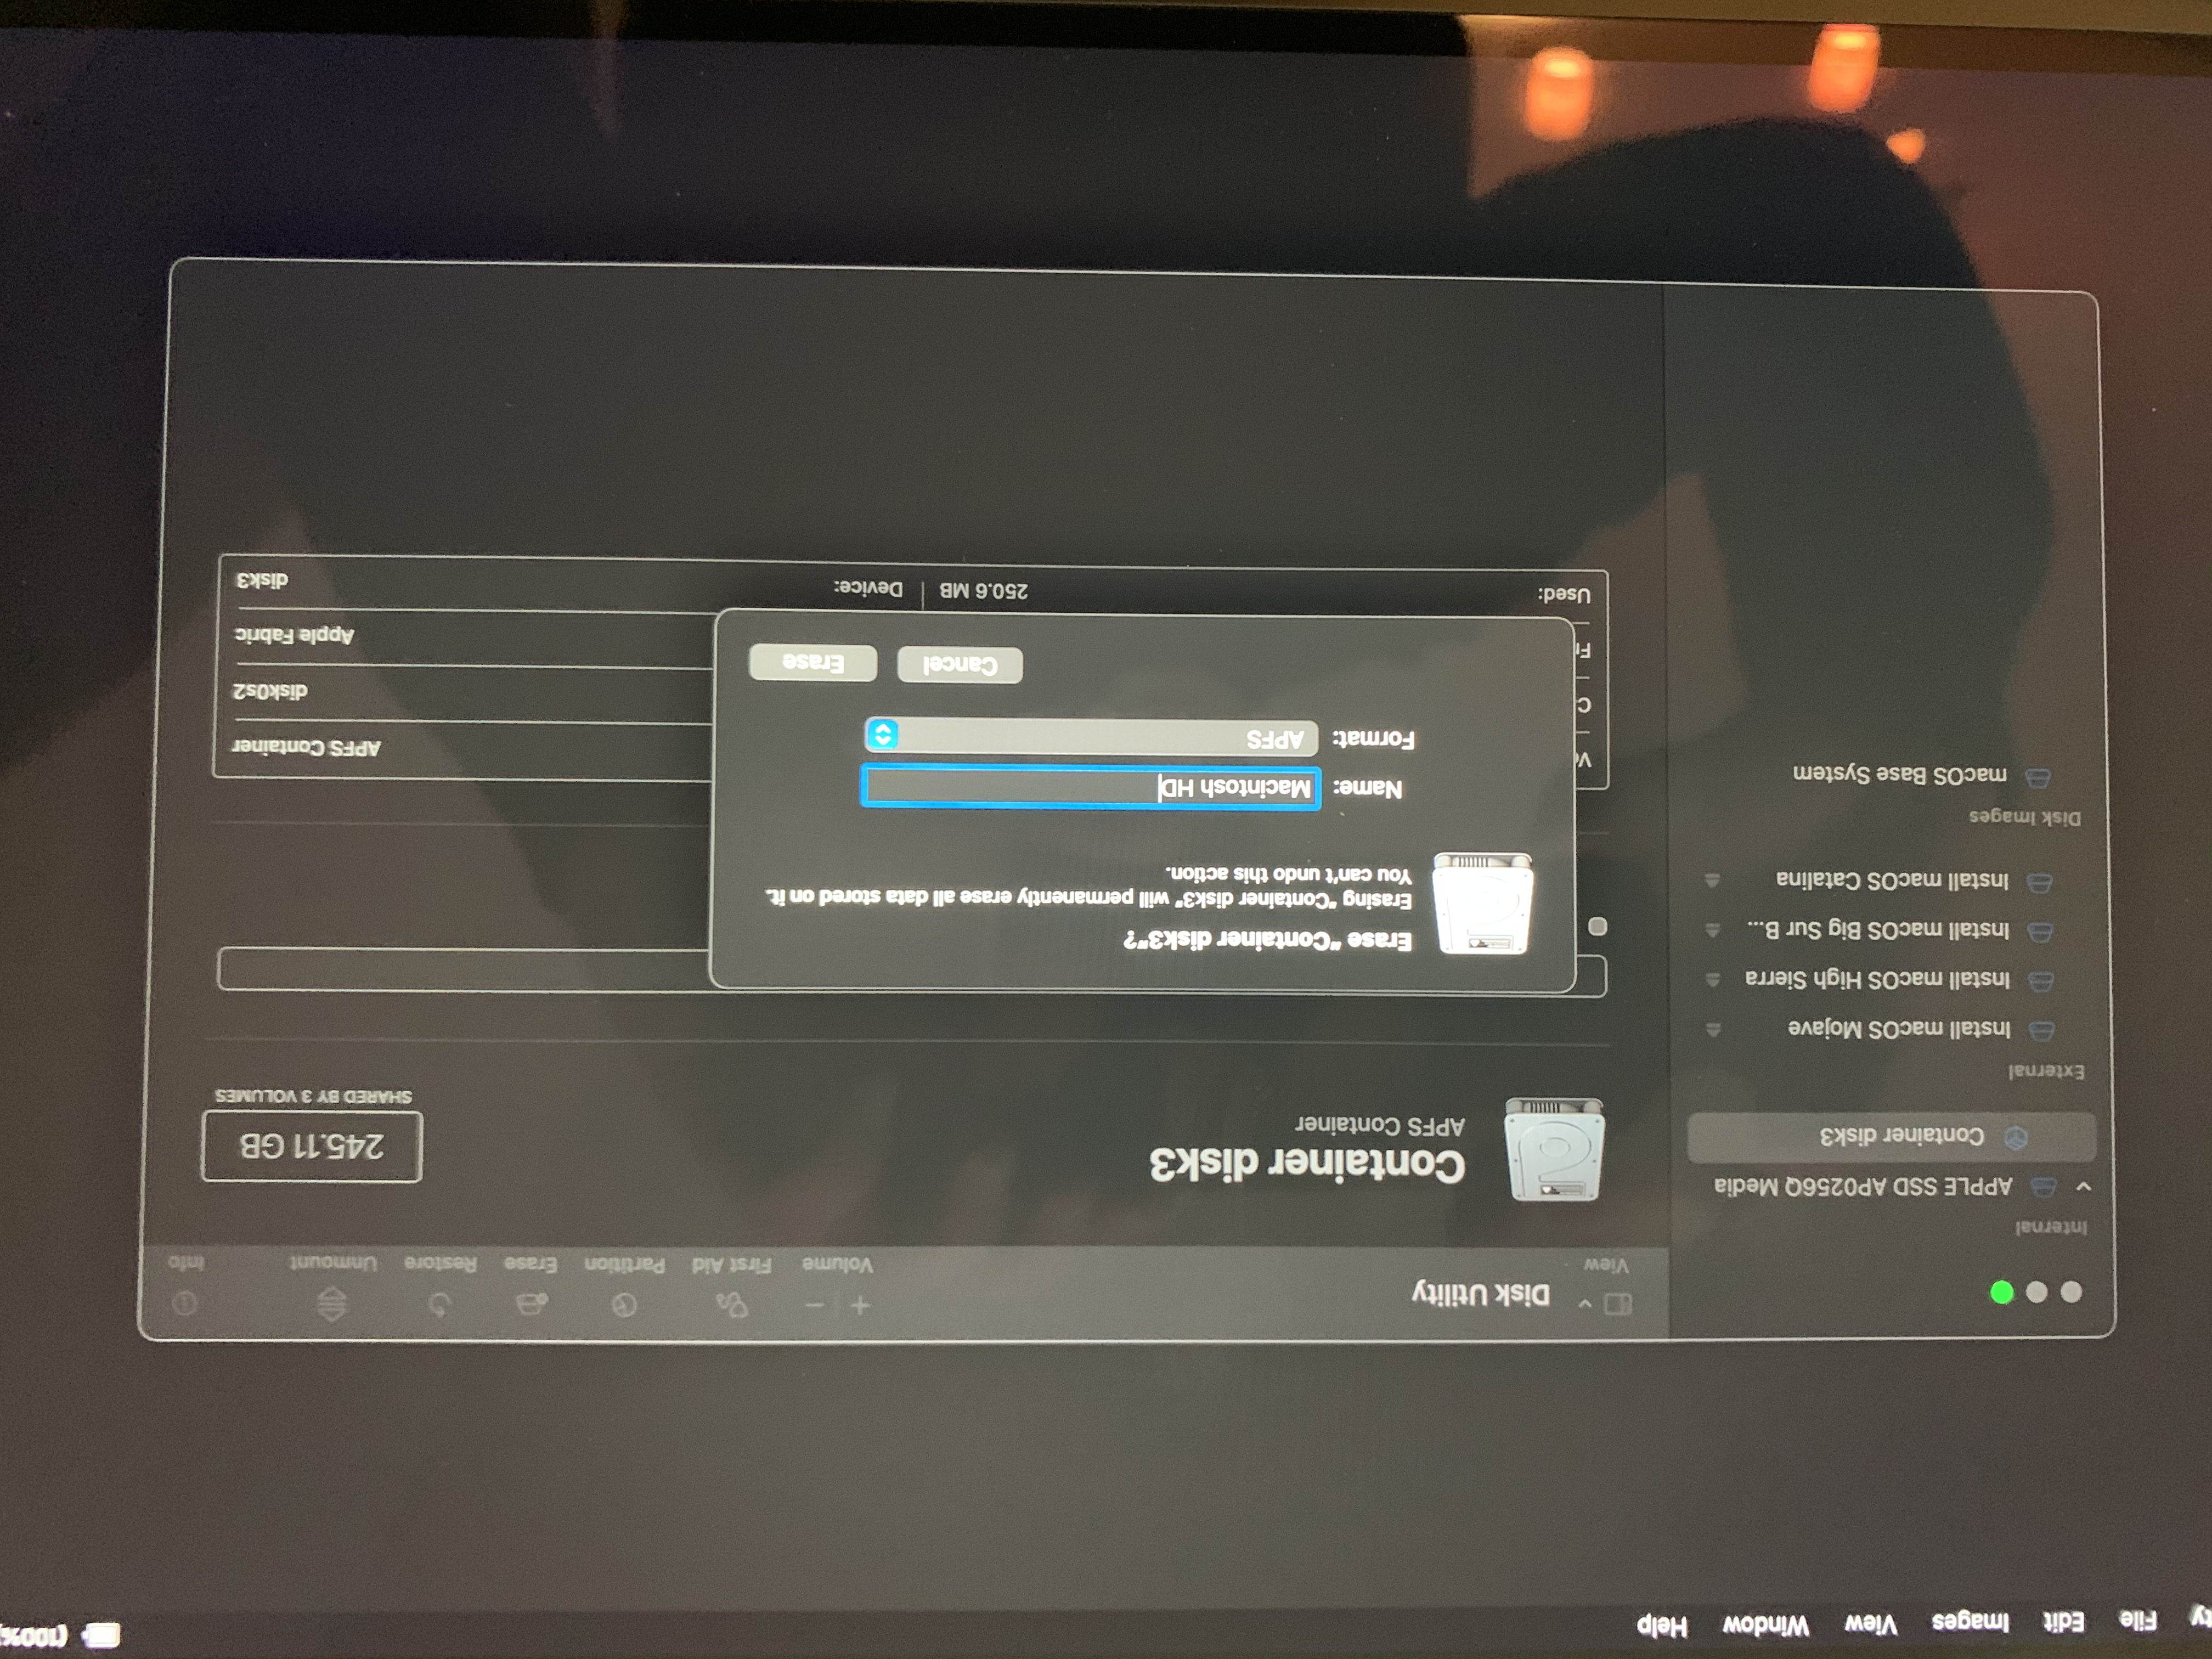
NOW: open Disk Utility and confirm the hard disk has one single partition called "Macintosh HD". If not (which should be rare) — erase the hard disk (which may be a greyed-out “Macintosh HD”, “Untitled” or the “Container”) until you get it visibly erased to show a single “Macintosh HD” volume. If you see "Macintosh HD - Data" at this point, start over from the beginning as the entire disk did not fully erase. The following screen shot gives an example of this rare occurrence.
Reinstall macOS as normal after that. The screen will go black if power is not connected during the installation (this is normal…)
You can disconnect the USB and plug in the power cable if necessary after the computer has reloaded the OS and is booted to the Welcome screen to continue on with the build.