DEP Is Now Required
All newly-purchased Macs must be built through Apple's Device Enrollment Program, or DEP.
There are two phases to DEP: enrolling the device, which is done by a reseller (or Apple directly); and assigning the device to our MDM Server, which is done through an Apple portal called 'School Manager.' TechShop isable to enroll systems if something was purchased through the University, but did not automatically get enrolled.
To have a computer assigned - contact us on Slack or send us a ticket (izzy-support@umich.edu) or an e-mail (miworkspace-mac-systems@umich.edu) with the serial number(s) to assign. Once assigned, it takes about an hour to propagate through the system before the computer can be built.
DEP Imaging – the new “on-campus” process.
This is very similar to the “@home” process – with the differences being that you will set up FileVault (“ironizzy”) when you claim the computer, log in with the “UM-Support” account after build and wait a few minutes until the Bootstrap application runs before doing anything else.
For new out of the box systems, the ideal path is as follows:
Contact us with the serial number to get the system assigned to our MDM server for an on-campus build. (If you are buying from Marketsite, you can find the serial number of a device in transit through the order status view. The PO number is usually the easiest way to find the right order.)
Wait for about an hour after we've acknowledged the MDM assignment.
Claim the serial number in the Stage System box on the top left of izzy.dsc.umich.edu by entering the just the serial number and pressing Stage or Claim.
Choose a destination group for this mac to appear in and press Pair.
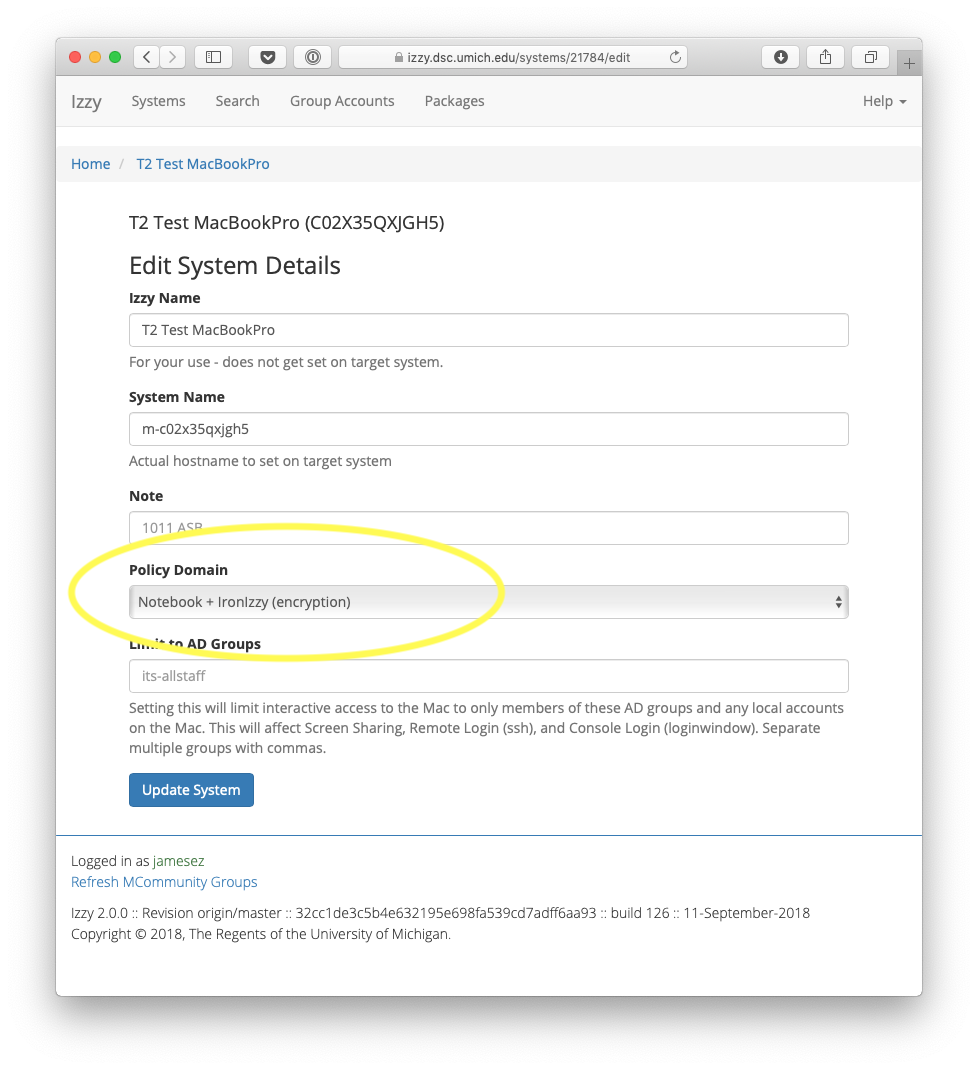
If the system is going to be encrypted (which we strongly recommend): Go to the computer's Izzy record and set the Policy Domain to something containing "ironizzy". Do this before you continue!
(MiWorkspace: Please also edit the "Izzy Name" to use the uniqname of the primary computer user if this is a dedicated computer. Otherwise, please edit the "Izzy Name" to include the serial number or some other descriptive text that could easily be used to help locate the computer.):
Unbox the Mac and start it up. If the computer has already walked through the setup assistant before the MDM assignment, then it should be wiped-and-reloaded before starting the process. If you are unsure of how to wipe-and-reload mac with a current OS, please see the links at the bottom of the page.
After the first few screens (typically: language picker if any, how to connect the network), you should see this screen like this:
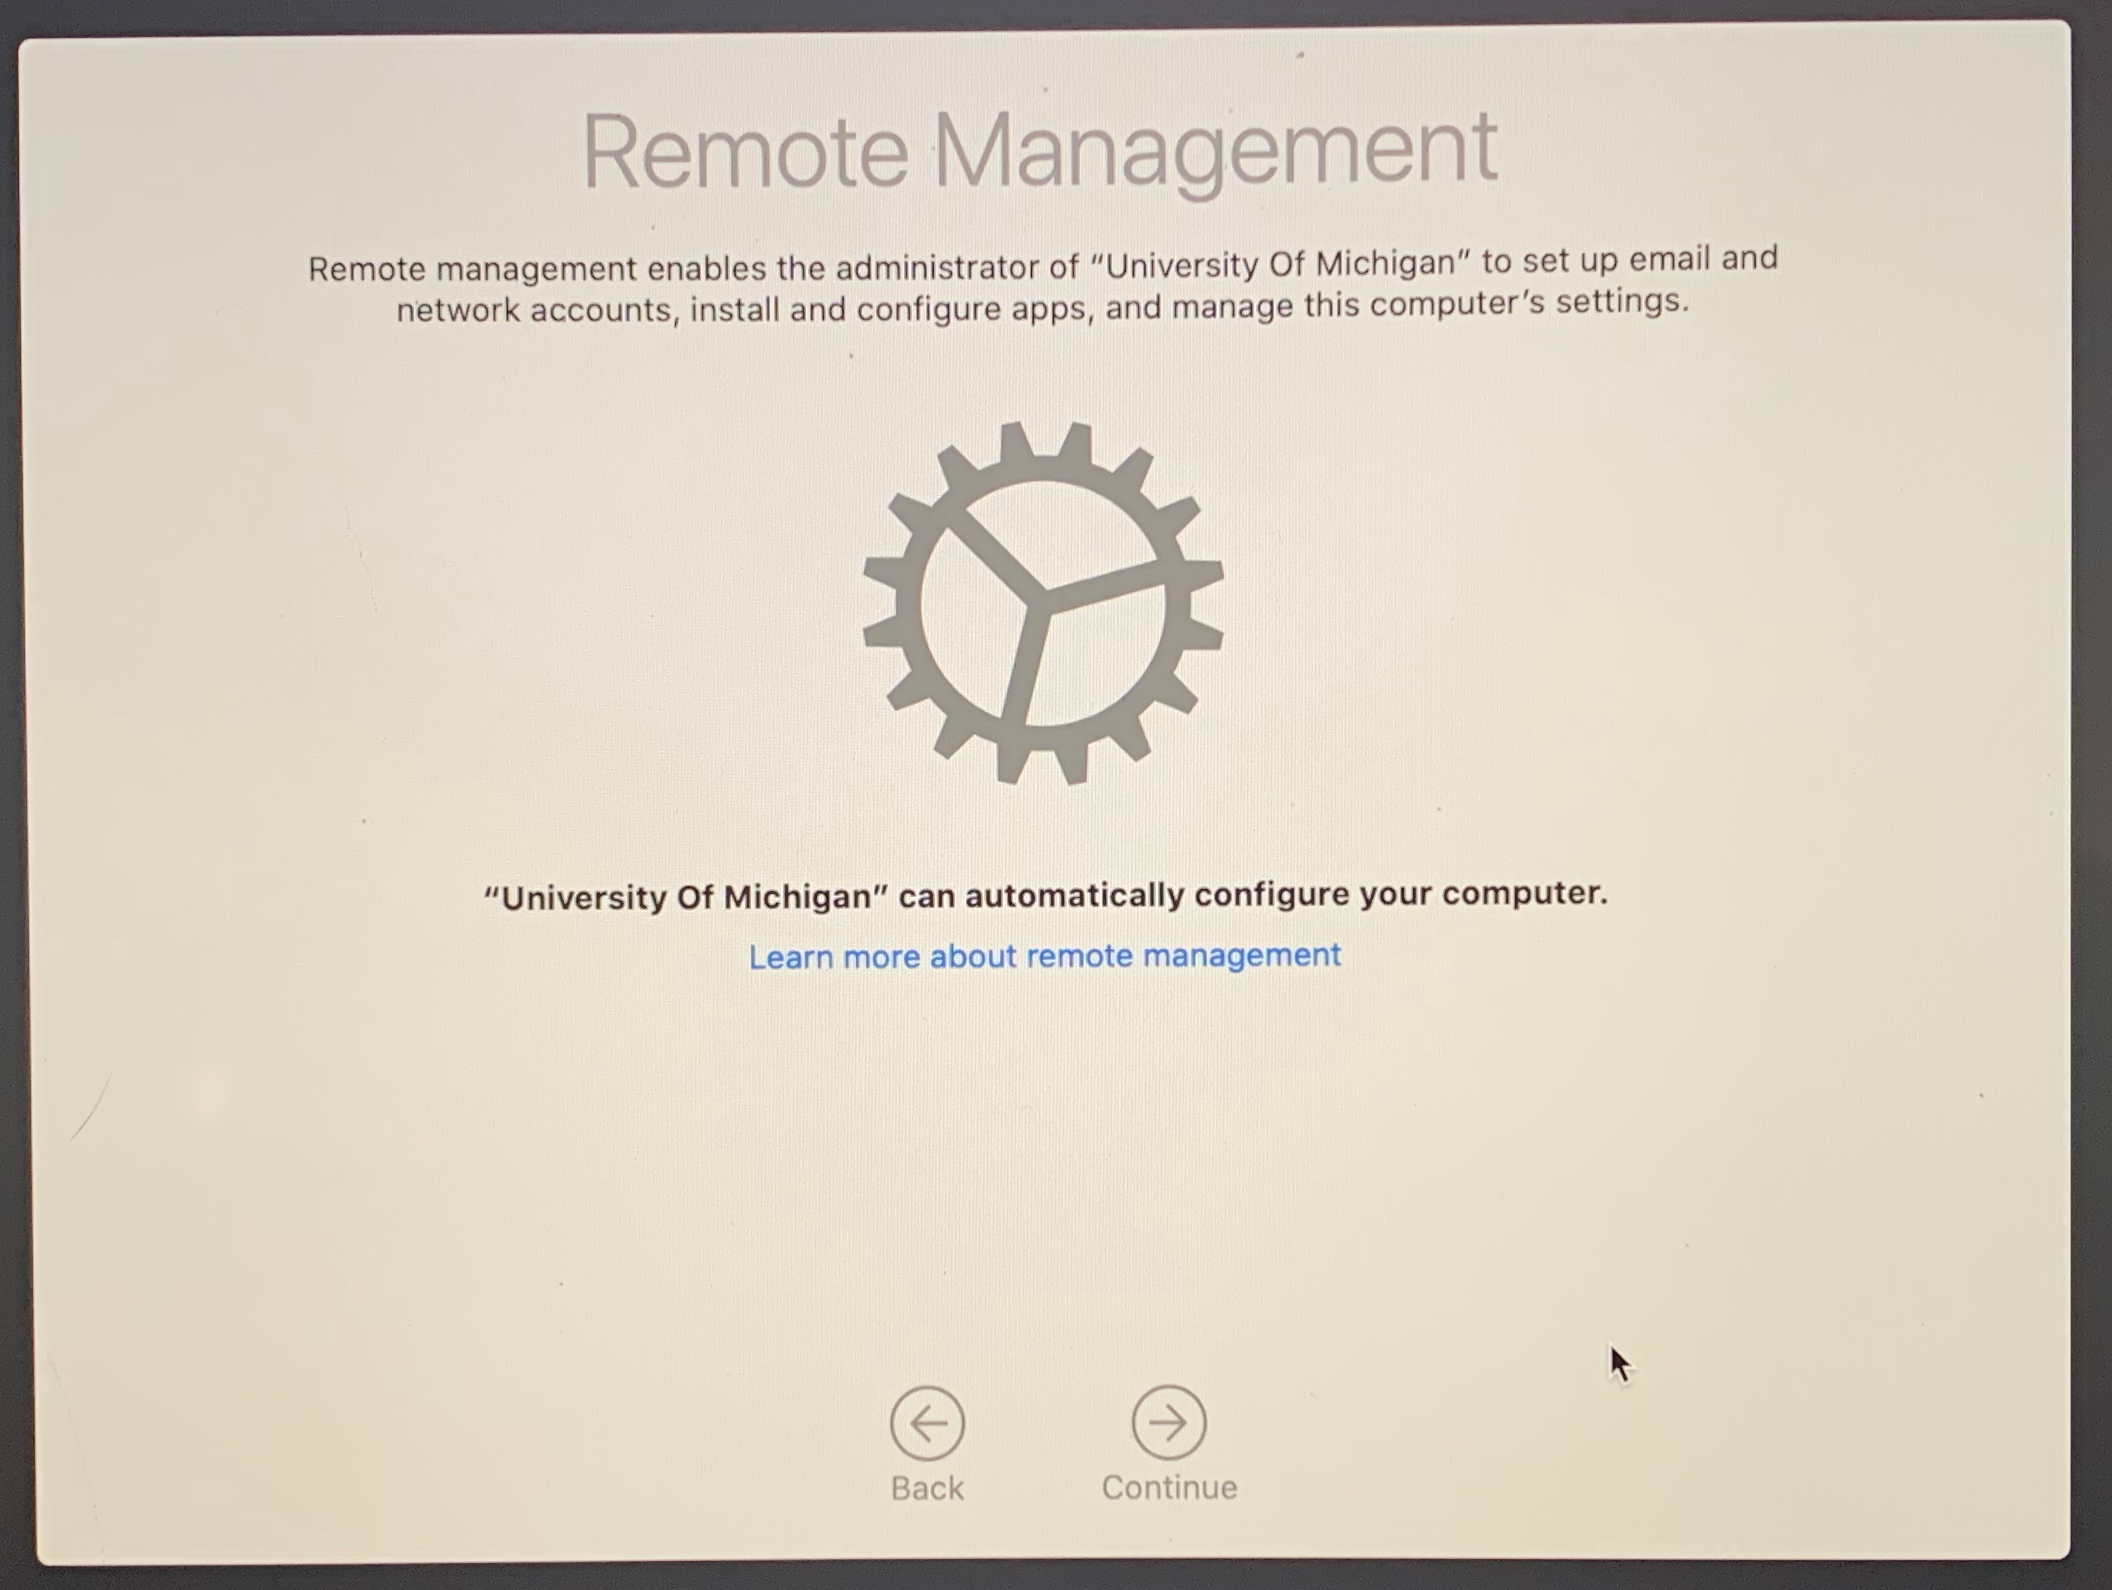
Click Continue.
Setup will then skip a bunch of panes and you should walk through any default options. UNLESS:
If you see the 'create an account' pane, things didn't sync up and the Mac didn't pick up its DEP config. Often the easiest thing is to wipe and reload the OS through Internet Recovery (or use a boot stick on an M1 Mac) and start over. If you are unsure of how to wipe-and-reload mac with a current OS, please see the links at the bottom of the page.
If you see the ‘create an account’ pane after the Remote Management screen, this means the system is assigned to the Izzy @Home workflow and you should reach out to us to change the assignment to the on-campus workflow before starting over. More info about the @home workflow can be found here.
Using the "UM-Support" account and how to use it to set up FileVault, etc.
When the computer has finished going through the setup assistant, you’ll be at a boot screen with “UM-Support” and “Other…” showing.
At this point, you will log into the computer with the new "UM-Support" account and associated password. (If you do not know the password to this account, please ask the Mac Team in Slack.) You should not log into the computer with your M-1 or any other account initially as "UM-Support" is an administrator account and can be used for all admin purposes and must be used for successful on-campus building!
Wait about 2 minutes after initial log in – do not do anything else! – and the “U-M Izzy Bootstrap” process that will install software will pop up:
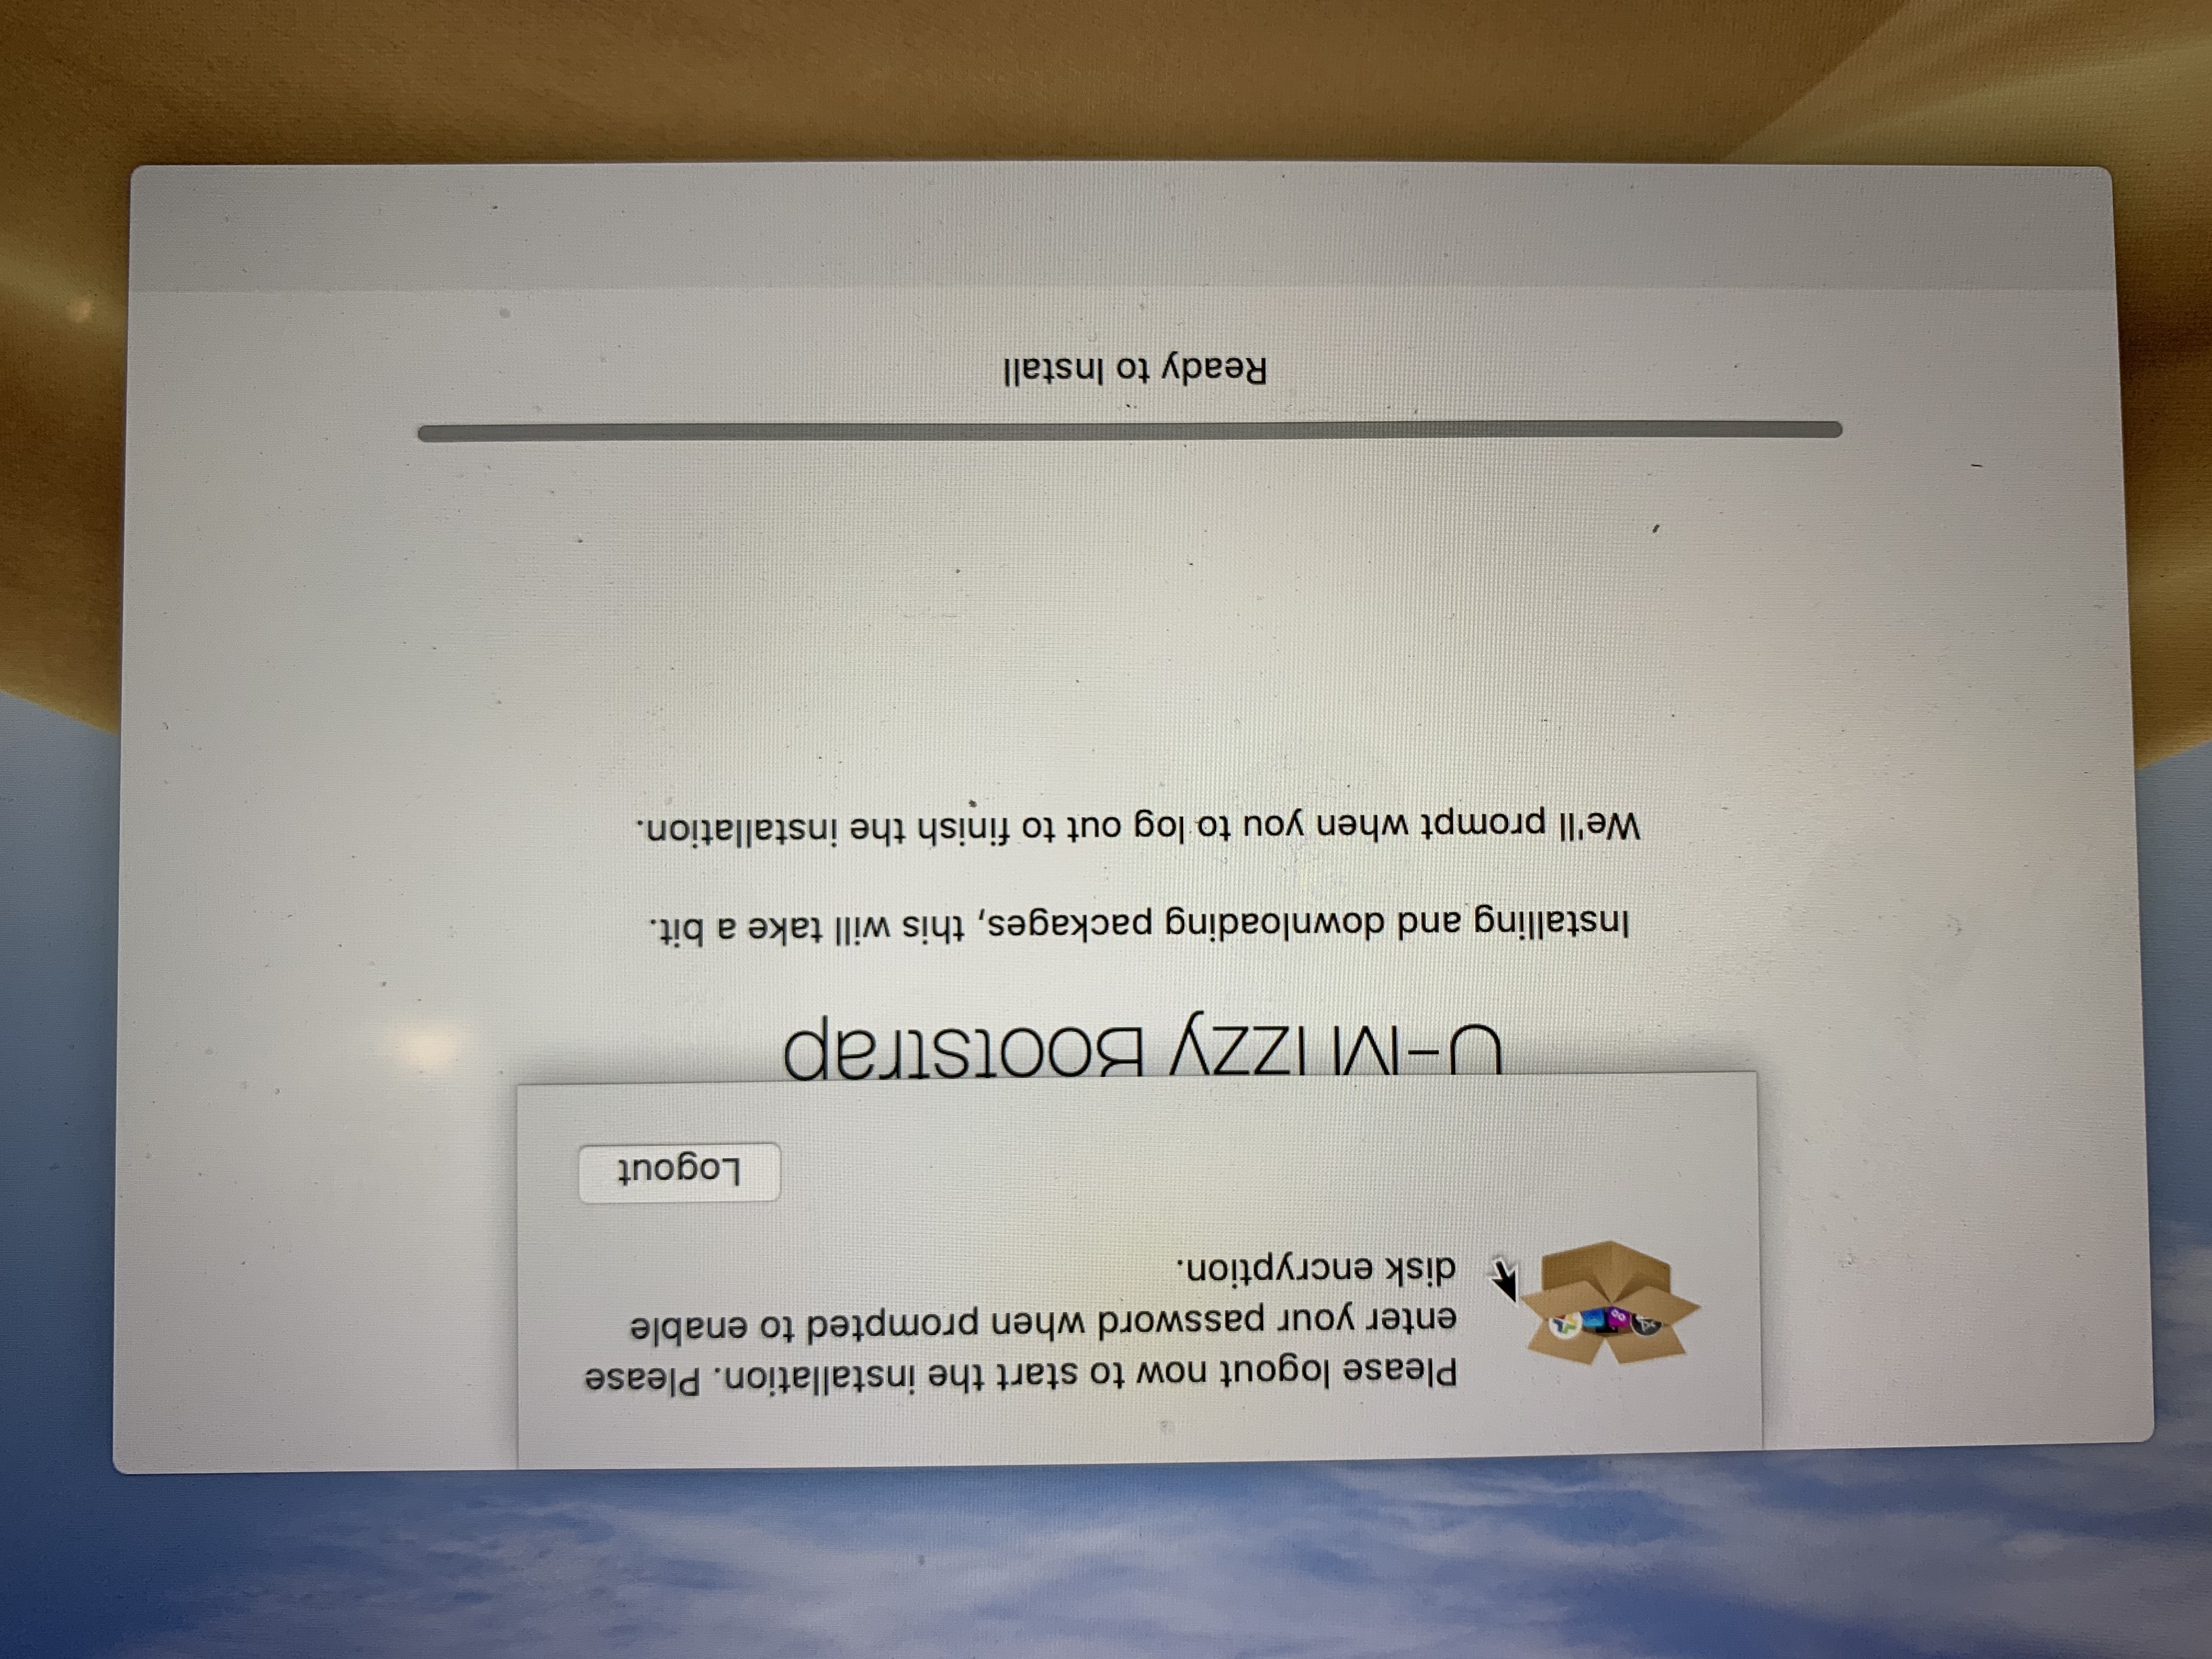
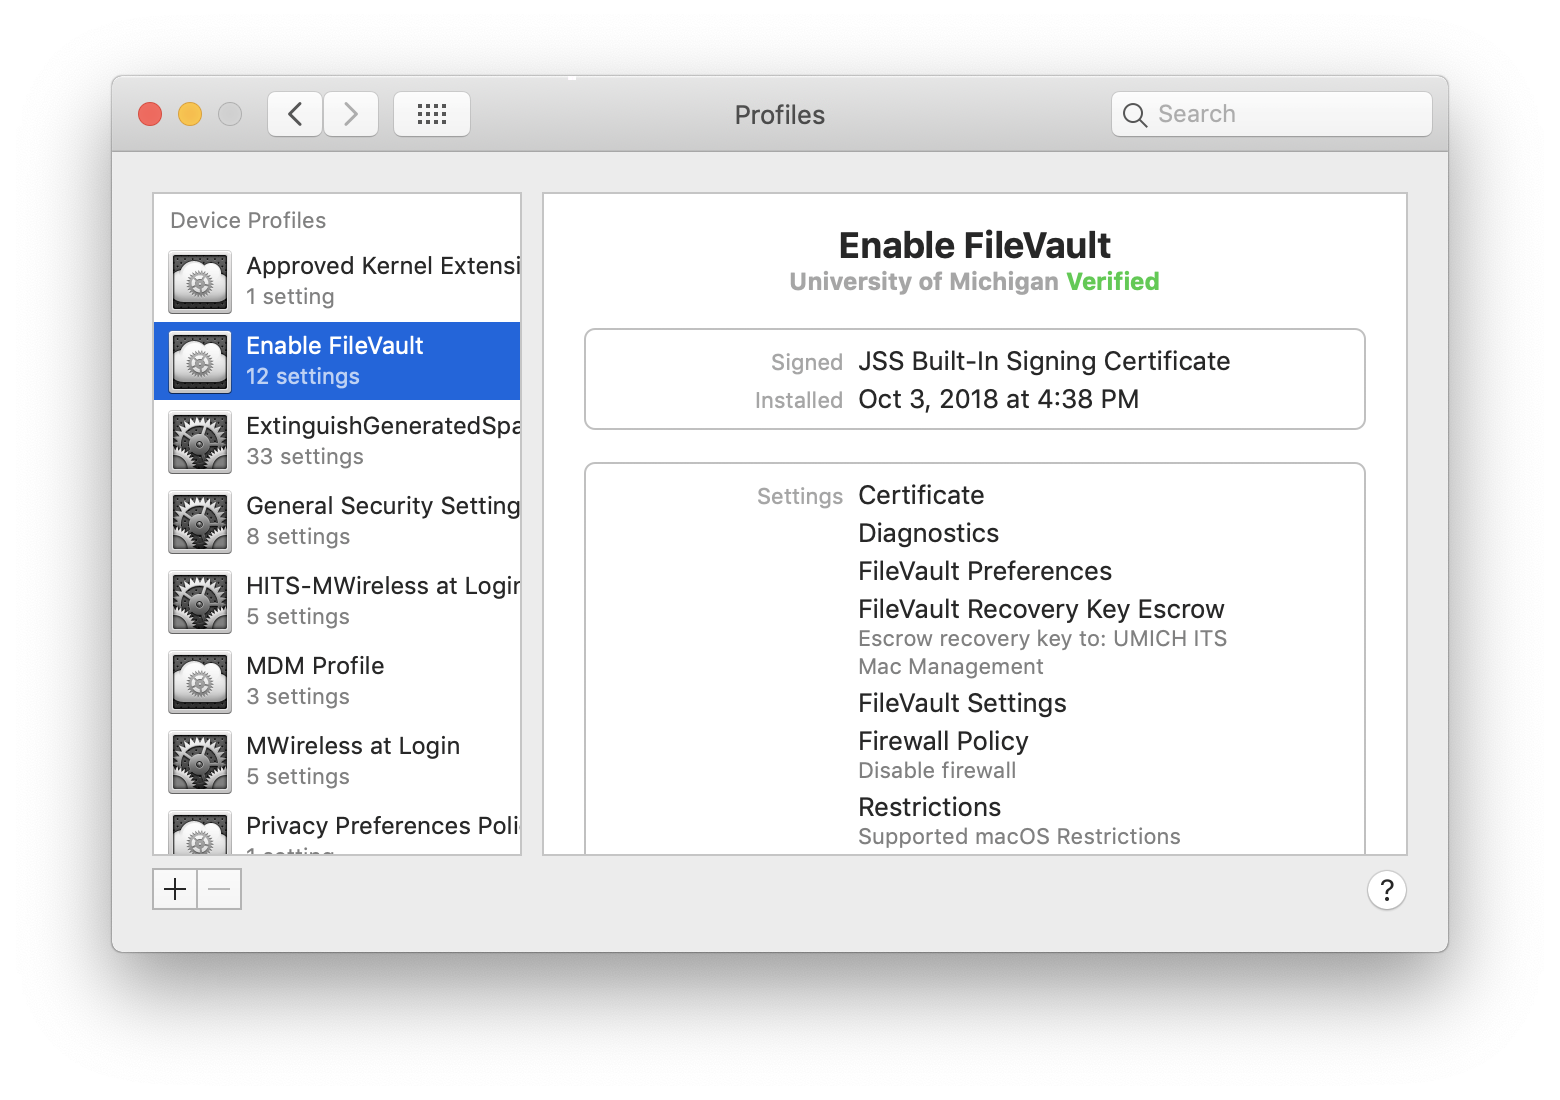
Before clicking “Logout” – if you have turned on FileVault for the computer (which is still strongly recommended) confirm that the 'Enable FileVault' profile has landed in System Preferences > Profiles before logging out. If it is not there - please reach out to the Mac Team on Slack before continuing!
After you click Logout, FileVault will initiate (if you have “ironizzy” selected – a FileVault Recovery Key may be displayed and this is expected – you do not need to store this and can click through the boxes that pop up) and applications will install and may reboot your computer as part of that process.
VERY IMPORTANT: Do not log out and log in with any account other than “UM-Support” until FileVault has been turned on! Logging in with any other account before FileVault is turned on can break this automatic workflow. It is strongly recommended that you reboot the computer one final time before proceeding to have an end-user log in to confirm FileVault is configured correctly!
To add new users to the FileVaulted computer: Log in at the boot screen to the "UM-Support" account. Once logged in, then log out. This will bring you back to the NoMAD login screen and you can have additional users log in. The users will be automatically FileVaulted so you do not need to manually add them any more!
Additional Caveats
Izzystor restored users might not show up on the boot screen after they log in. If that happens, go to Applications → Utilities → Service Provider Support and run the “Update Preboot (requires restart)” task.
On M1 Macs – after you unlock the computer at the FileVault screen, you will be dropped at the NoMAD login screen and must log in a second time. This is (currently) expected behavior on the M1 models.
More details on the "UM-Support" and the "UM FileVault Mgmt" accounts can be found here: Izzy-Managed Support Accounts
- For how to wipe-and-reload a 10.15 or greater Mac, we have some additional pages here:
To wipe-and-reload macOS 11 using a boot stick on an M1 mac
To wipe-and-reload macOS 11 using the Recovery partition